- 2007 Jeep Liberty — Owner’s Manual
- MoparPlus
- Последние записи
- Cтатьи про ремонт. Выпуск №113.
- Заметки 3aHyDного оптимиста
- Последние записи
- Не успел поставить фаркоп.
- Jeep Liberty 2007 MY. Owner’s Manual
- скачать в формате pdf
- Из чего состоит инструкция по эксплуатации Jeep Liberty?
- Приложение My Uconnect
- Jeep 2007 Liberty Manual
- 417 pages Owner’s Manual for Jeep 2007 Liberty Automobile
- Jeep 2007 Liberty Specifications:
- Jeep 2007 Liberty Document Transcription:
- Jeep LIBERTY 2007, Liberty 2007 Owner Manual
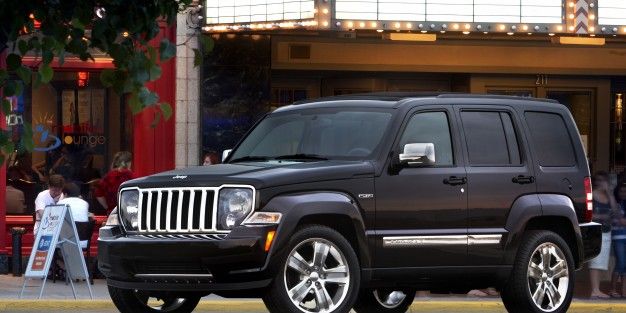
2007 Jeep Liberty — Owner’s Manual

Posted on 15 Apr, 2015
Model: 2007 Jeep Liberty
Pages: 417


Before you start to drive this vehicle, read this manual. Be sure you are familiar with all vehicle controls, particularly those used for braking, steering and transmission and transfer case shifting. Learn how your vehicle handles on different road surfaces. Your driving skills will improve with experience.
When driving off-road or working the vehicle, don’t overload it or expect it to overcome the laws of nature. Always observe federal, state, provincial, and local laws wherever you drive. As with other vehicles of this type, failure to operate this vehicle correctly may result in loss of control or an accident. Be sure to read “On-Road/Off-Road Driving Tips” in Section 5 of this manual.
Utility vehicles have a significantly higher roll over rate than other types of vehicles. This vehicle has a higher ground clearance, higher center of gravity, and narrower track than many passenger cars. It is capable of performing better in a wide variety of off-road applications. Driven in an unsafe manner, all vehicles can be caused to go out of control.
Because of the higher center of gravity and the narrower track, if this vehicle is out of control it may roll over when some other vehicles may not. Do not attempt sharp turns or abrupt maneuvers or other unsafe driving actions that can cause loss of vehicle control. Failure to operate this vehicle safely may result in an accident, roll over of the vehicle, and severe or fatal injury. Drive carefully.
Источник
MoparPlus
Бортжурнал пользователя MoparPlus в General
- 187
записей - 93
комментария - 21489
просмотров
Последние записи

Cтатьи про ремонт. Выпуск №113.
Появилась первая часть мегаобзора поломок Гранд Чероки. Открывает серию Пентастар 3.6. Подготовили статью со ссылками на часть использованных документов, устройство масляного насоса, систему смазки, как разваливается рокер, чудеса ERC и прочие технические радости. Материал весьма объёмный, разношёрстный и редкий.
Вопрос постоянным читателям.
1. Сколько понадобилось дней/часов чтобы прочитать и обработать информацию по WK2? Без учёта съёмок
2. Каким будет окончательный хронометраж всех частей?
Смело насыпайте плюсов в карму и жмите лейкоцит.
- Подробнее.
- 0 комментариев

Заметки 3aHyDного оптимиста
Бортжурнал пользователя 3aHyDa в Grand Cherokee
- 1
запись - 1
комментарий - 192
просмотра
Последние записи

Не успел поставить фаркоп.
Печально начинать свою историю с такого события, но сегодня в пробке на Можайском моему Чирику в опу въехала дама на стареньком лансере.
Пришлось на всякий случай еще и скорую вызывать и придерживать, пока припадок не закончился.
Интересно, как она права получила? еще и чужого ребенка везла.
раздавив лансеру передок, Чирик почти отделался ссадинами на бампере и накладке. почти, потому что даму заклинило как раз с нажатым газом, поэтому небольшая, но с пробитием ЛКП вмятина почти на самом краю двери багажника имеется
это ж теперь всю дверь перекрашивать?
Теперь и Чирик у меня в попу раненый
второй по счету Фрил откатал год, прежде чем об него умер лексус на МКАДе
Вообще, конечно, после собранного индусами европейца, собранный, как говорят, мексиканцами американец, выглядит немного кондово — много комфорта, нормальная динамика (3.6), но где-то местами не хватает чего-то ставшего привычным за прошедшие 15 лет и 300+тыс пробега. Но об этом позже.
Источник
Jeep Liberty 2007 MY. Owner’s Manual
скачать в формате pdf
![]()
Прочитав инструкцию, вы узнаете о характерных особенностях автомобиля и ознакомитесь с советами по эксплуатации Jeep Liberty 2007 года выпуска в различных дорожных условиях. Руководство ознакомит вас со свеми функциями и особенностями автомобиля, а также в нем содержится важная информация по его безопасной эксплуатации.
Язык: английский
Формат: pdf
Год выпуска: 2007
Размер файла: 1,6 Мб
электронная книга в формате pdf
1 интересовались книгой
Помните, что в комплектацию Вашего автомобиля могут входить не все описанные в инструкции функции. В руководстве по эксплуатации возможны расхождения с описанием Вашего конкретного автомобиля, а также вы можете встретить описание таких вариантов исполнения и такого оборудования, которые отсутствуют на вашем автомобиле.
В связи с этим просим принимать во внимание, что настоящее электронное руководство по эксплуатации Jeep Liberty ни в коей мере не может заменить его печатный вариант.
Для скачивания инструкции по эксплуатации необходимо перейти по ссылке Скачать , подтвердить ознакомление с условиями использования и загрузить файл на ваше устройство. Мы не ограничиваем скорость загрузки. Если у вас возникнут трудности — воспользуйтесь формой обратной связи. Мы постараемся решить проблему и ответить вам как можно быстрее.
Подробнее о том, как скачать руководство по эксплуатации Jeep Liberty бесплатно.
![]()
Из чего состоит инструкция по эксплуатации
Jeep Liberty?
описание всех функций и возможностей автомобиля
необходимая информация для правильной эксплуатации Jeep Liberty
полезные советы по уходу за автомобилем
технические характеристики и требования к обслуживанию
Приложение My Uconnect
My Uconnect предлагает вам широкий спектр услуг, чтобы вы могли оставаться на связи со своим автомобилем и переносить свой цифровой мир на борт. Мое мобильное приложение Uconnect и услуги Uconnect доступны для автомобилей Jeep, оснащенных новым Uconnect Box.
Источник
Jeep 2007 Liberty Manual
417 pages Owner’s Manual for Jeep 2007 Liberty Automobile
Jeep 2007 Liberty Specifications:
- Jeep
- Automobile
- Owner’s Manual, PDF
- 417
Download 2007 Liberty Manual (417 pages)


Jeep 2007 Liberty Document Transcription:
PARKING BRAKE To set the parking brake, pull the lever up as firmly as possible. When the parking brake is applied with the ignition ON, the “Brake Warning Light” in the instru- ment cluster will light. To release the parking brake, pull up slightly, press the center button, then lower the lever completely. NOTE: The instrument cluster “Brake Warning L…
Tire PSI Shows the pressure and location of each tire, except for the spare tire. The tire location will blink when under pressure. Blank Screen Shows a blank screen. Pressing the C/T button returns to the Compass and Temperature display. Pressing the STEP button returns you to the Average Miles per Gallon display. Automatic Compass Calibration This compass …
WARNING! An improperly adjusted Weight Distributing Hitch system may reduce handling, stability, braking per- formance, and could result in an accident. Weight Distributing Systems may not be compatible with Surge Brake Couplers. Consult with your hitch and trailer manufacturer or a reputable Recreational Vehicle dealer for additional information. Weight Dis…
WARNING! Unapproved modifications or service procedures to the front passenger seat assembly, its related compo- nents, or seat cover may inadvertently change the airbag deployment in case of a frontal crash. This could result in death or serious injury to the front seat passenger if the vehicle is involved in an acci- dent. A modified vehicle may not comply…
CAUTION! Transmission damage may occur if the automatic transmission is shifted into P (Park) with the transfer case in N (Neutral) and the engine running. With the transfer case in N (Neutral) ensure that the engine is OFF prior to shifting the transmission into P (Park) (refer to steps7–8above). Shifting Out Of Neutral (N) Use the following procedure to …
CD Player Operation NOTE: The ignition switch must be in the ON or ACC position and the Power / Volume control pushed ON before the CD player will operate. Inserting The Compact Disc CAUTION! This CD player will accept 4 3 ⁄ 4 inch (12 cm) discs only. The use of other sized discs may damage the CD player mechanism. You may either insert or eject a disc wit…
UNDERSTANDING THE FEATURES OF YOUR VEHICLE 105 3 …
The TPM System will warn the driver of a low tire pressure if the tire pressure falls below the low pressure warning threshold for any reason, including low tem- perature effects. The TPM System will continue to warn the driver of low tire pressure as long as the condition exists, and will not turn off until the tire pressure is at or above recom- mended col…
Maintenance After driving through deep water, inspect your vehicle fluids and lubricants (engine oil, transmission oil, axle, transfer case) to assure the fluids have not been contami- nated. Contaminated fluid (milky, foamy in appearance) should be flushed/changed as soon as possible to pre- vent component damage. Driving In Snow, Mud and Sand In heavy snow…
EMISSION CONTROL SYSTEM MAINTENANCE The “Scheduled” maintenance services, listed in bold type must be done at the times or mileages specified to assure the continued proper functioning of the emission control system. These, and all other maintenance services included in this manual, should be done to provide best vehicle performance and reliability. More…
Источник
Jeep LIBERTY 2007, Liberty 2007 Owner Manual
![]()
TABLE OF CONTENTS
THINGS TO KNOW BEFORE STARTING YOUR VEHICLE . . . . . . . . . . . . . . . . . . . . . . . . . . . .
UNDERSTANDING THE FEATURES OF YOUR VEHICLE . . . . . . . . . . . . . . . . . . . . . . . . . . . . .

Vehicle Identification Number . . . . . . . . . . . . . . .
How To Use This Manual . . . . . . . . .
Vehicle Modifications / Alterations . . . . . . . . . . .

Thank you for selecting a Jeep Liberty and welcome to our worldwide family.
This is a specialized utility vehicle designed for both on-road and off-road use. It can go places and perform tasks for which conventional two-wheel drive vehicles were not intended. However, on-road ride and handling will have a different feel from what drivers experience with other vehicles, so take time to become familiar with your vehicle.
The two-wheel drive utility vehicle was designed for on-road use only. It is not intended for off-road driving or use in other severe conditions suited for a four-wheel drive vehicle.
Before you start to drive this vehicle, read this manual. Be sure you are familiar with all vehicle controls, particularly those used for braking, steering and transmission and transfer case shifting. Learn how your vehicle
handles on different road surfaces. Your driving skills will improve with experience. When driving off-road or working the vehicle, don’t overload it or expect it to overcome the laws of nature. Always observe federal, state, provincial, and local laws wherever you drive.
As with other vehicles of this type, failure to operate this vehicle correctly may result in loss of control or an accident. Be sure to read “On-Road/Off-Road Driving Tips” in Section 5 of this manual.
Roll Over Warning
Utility vehicles have a significantly higher roll over rate than other types of vehicles. This vehicle has a higher ground clearance, higher center of gravity, and narrower track than many passenger cars. It is capable of performing better in a wide variety of off-road applications. Driven in an unsafe manner, all vehicles can be caused to go out of control. Because of the higher center of gravity

and the narrower track, if this vehicle is out of control it may roll over when some other vehicles may not.
Do not attempt sharp turns or abrupt maneuvers or other unsafe driving actions that can cause loss of vehicle control. Failure to operate this vehicle safely may result in an accident, roll over of the vehicle, and severe or fatal injury. Drive carefully.
Roll Over Warning Label
Failure to use driver and passenger seat belts provided
is a major cause of severe or fatal injury. In fact, the U.S. 1 government notes that the universal use of existing seat belts could cut the highway death toll by 10,000 or more each year, and could reduce disabling injuries by 2 million annually. In a roll over crash an unbelted person
is significantly more likely to die than a person wearing a seat belt. Always buckle up.
This manual has been prepared with the assistance of service and engineering specialists to acquaint you with the operation and maintenance of your new vehicle. It is supplemented by a Warranty Information Booklet and various customer oriented documents. You are urged to read these publications carefully. Following the instructions and recommendations in this manual will help assure safe and enjoyable operation of your vehicle.

NOTE: After you read the manual, it should be stored in the vehicle for convenient reference and remain with the vehicle when sold so that the new owner will be aware of all safety warnings.
When it comes to service, remember that the manufacturer knows your vehicle best, has the factory-trained technicians and genuine Mopar parts, and is interested in your satisfaction.
Engine exhaust, some of its constituents, and certain vehicle components contain or emit chemicals known to the State of California to cause cancer and birth defects or other reproductive harm. In addition, certain fluids contained in vehicles and certain products of component wear contain or emit chemicals known to the State of California to cause cancer and birth defects or other reproductive harm.
HOW TO USE THIS MANUAL
Consult the table of contents to determine which section contains the information you desire.
The detailed index, at the rear of this manual, contains a complete listing of all subjects.
Consult the following table for a description of the symbols that may be used on your vehicle or throughout this owner’s manual:


WARNINGS AND CAUTIONS
This manual contains WARNINGS against operating
procedures which could result in an accident or bodily
injury. It also contains CAUTIONS against procedures
which could result in damage to your vehicle. If you do
not read this entire manual you may miss important
information. Observe all Warnings and Cautions.
VEHICLE IDENTIFICATION NUMBER
The vehicle identification number (VIN) is located on a
stamped plate on the bottom of the left front A-Pillar,
visible from outside of the vehicle through the wind-
shield. This number also appears on the Automobile
Vehicle Identification Number
Information Disclosure Label affixed to a window on
NOTE: It is illegal to remove the VIN plate.
your vehicle. Save this label for a convenient record of
your vehicle identification number and optional equip-

VEHICLE MODIFICATIONS / ALTERATIONS
Any modifications or alterations to this vehicle could seriously affect its roadworthiness and safety and may lead to an accident resulting in serious injury or death.
![]()
THINGS TO KNOW BEFORE STARTING YOUR VEHICLE
A Word About Your Keys . . . . . . . . . . . . . . . . . .
Steering Wheel Lock — If Equipped . . . . . . . . . .
▫ To Manually Lock The Steering Wheel . . . . . . .
▫ To Release The Steering Wheel Lock . . . . . . . . .
Sentry Key Immobilizer System . . . . . . . . . . . . . .
▫ Important Note About Service . . . . . . . . . . . . .
▫ Customer Key Programming . . . . . . . . . . . . . .
Security Alarm System — If Equipped . . . . . . . . .

12 THINGS TO KNOW BEFORE STARTING YOUR VEHICLE
▫ To Unlatch The Swing Gate Flip-Up Window
▫ To Use The Panic Alarm . . . . . . . . . . . . . . .
▫ To Program Additional Transmitters . . . . . . .
▫ Transmitter Battery Service . . . . . . . . . . . . . .
▫ Power Door Locks — If Equipped . . . . . . . . .
▫ Automatic Door Locks — If Equipped . . . . . .
▫ Child Protection Door Lock . . . . . . . . . . . . . .
▫ Lap/Shoulder Belt Operating Instructions . . . . .39
▫ Rear Center Lap/Shoulder Belt
▫ Adjustable Upper Shoulder Belt Anchorage . . . .
▫ Automatic Locking Mode — If Equipped . . . . .44
▫ Energy Management Feature . . . . . . . . . . . . . .
▫ Enhanced Seat Belt Use Reminder System

▫ Seat Belts And Pregnant Women . . . . . . . . . . . .48
▫ Seat Belt Extender . . . . . . . . . . . . . . . . . . . . . .48
▫ Driver And Front Passenger Supplemental Restraint Systems (SRS) — Airbags . . . . . . . . . .49
▫ Child Restraint . . . . . . . . . . . . . . . . . . . . . . . .64
Engine Break-In Recommendations . . . . . . . . . . .74
THINGS TO KNOW BEFORE STARTING YOUR VEHICLE
▫ Safety Checks You Should Make Inside
▫ Safety Checks You Should Make Outside

14 THINGS TO KNOW BEFORE STARTING YOUR VEHICLE
A WORD ABOUT YOUR KEYS
The keys for your new vehicle are enclosed in a plastic bag with the key code number on it. If you received your keys without the bag, ask your dealer to give you the number. The key code can also be obtained by the dealer from your vehicle invoice.
Ignition Key Removal
To remove the ignition key, depress and hold the key release button, turn the ignition key to LOCK and remove the key.
Ignition Key Release Button

Automatic Transmission — If Equipped
To remove the ignition key, place the gearshift lever in P (Park), turn the ignition key to LOCK and remove the key.
Ignition Key Positions
THINGS TO KNOW BEFORE STARTING YOUR VEHICLE 15
Leaving children in a vehicle unattended is dangerous for a number of reasons. A child or others could 2 be injured. Children should be warned not to touch
the parking brake, brake pedal, or the gear selector lever. Do not leave the keys in the ignition. A child could operate power windows, other controls, or move the vehicle.
An unlocked vehicle is an invitation to thieves. Always remove the key from the ignition, and lock all doors when leaving the vehicle unattended.

16 THINGS TO KNOW BEFORE STARTING YOUR VEHICLE
If you open the driver’s door and the key is fully inserted in the ignition switch, a chime will sound to remind you to remove the key.
STEERING WHEEL LOCK — IF EQUIPPED
Your vehicle may be equipped with a passive steering wheel lock (manual transmission only). This lock prevents steering the vehicle without the ignition key. If the steering wheel is moved a half turn in either direction and the key is not in the ignition, the steering wheel will lock.
To Manually Lock the Steering Wheel
With the engine running, rotate the steering wheel 1/2 revolution from straight ahead position, turn off the engine and remove the key. Rotate the steering wheel slightly in both directions until the lock engages.
To Release the Steering Wheel Lock
Insert the key in the ignition and turn the wheel slightly to the right or left to disengage the lock.
NOTE: If you turned the wheel to the right to engage the lock, you must turn the wheel slightly to the right to disengage it. If you turned the wheel to the left to engage the lock, turn the wheel slightly to the left to disengage it.
SENTRY KEY IMMOBILIZER SYSTEM
The Sentry Key Immobilizer System (SKIM) prevents unauthorized operation of the vehicle by disabling the engine. The system will shut the engine down after 2 seconds of running if an invalid key is used to start the vehicle. This system utilizes ignition keys which have an electronic chip (transponder) embedded into them. Only keys that have been programmed to the vehicle can be used to start and operate the vehicle for longer than the 2 second validation time period.

The Sentry Key Immobilizer System does not need to be armed or activated. Operation of the system is automatic regardless of whether or not the vehicle is locked or unlocked. During normal operation, the SKIM indicator light will come on for 3 seconds immediately after the ignition switch is turned on for a bulb check. Afterwards, if the bulb remains on, this indicates a malfunction in the electronics. If the bulb begins to flash immediately after the ignition switch is turned on, this indicates that an invalid key is being used to start the vehicle. Both of these conditions will result in the engine being shut down after 2 seconds of running. Keep in mind that a key which has not been programmed is also considered an invalid key even if it is cut to fit the ignition for that vehicle.
If the SKIM indicator light comes on during normal vehicle operation (it has been running for longer than 10 seconds) a fault has been detected in the electronics and the vehicle should be serviced as soon as possible.
THINGS TO KNOW BEFORE STARTING YOUR VEHICLE 17
• The Sentry Key Immobilizer System is not compatible
with remote starting systems. Use of these systems may result in vehicle starting problems and loss of 2 security protection.
• Mobil Speedpass™, additional Sentry Keys, or any other transponder equipped components on the same keychain will not cause a key-related (Transponder) fault unless the additional part is physically held against the ignition key being used when starting the vehicle. Also, cell phones, pagers, or other RF electronics will not cause interference with this system.
All of the keys provided with your new vehicle have been programmed to the vehicle electronics.

18 THINGS TO KNOW BEFORE STARTING YOUR VEHICLE
Important Note About Service
A four digit PIN number is needed to service the Sentry Key Immobilizer System. This number can be obtained from your authorized dealer. However, this number can also be found on your customer invoice that you were given upon receipt of your vehicle.
NOTE: Only keys that have been programmed to the vehicle electronics can be used to start the vehicle. Once a Sentry Key has been programmed to a vehicle, it cannot be programmed to any other vehicle.
At the time of purchase, the original owner is provided with a four digit PIN number. This number is required for dealer replacement of keys. Duplication of keys may be performed at an authorized dealer or by using the Customer Key Programming procedure. This procedure consists of programming a blank key to the vehicle electronics. A blank key is one which has never been programmed.
NOTE: When having the Sentry Key System serviced, bring all vehicle keys to the dealer.
Customer Key Programming
You can program new keys to the system if you have two valid keys by doing the following:
1. Cut the additional Sentry Key Transponder blank(s) to match the ignition switch lock cylinder key code.
2. Insert the first valid key into the ignition switch and turn the ignition switch ON for at least 3 seconds but no longer than 15 seconds. Turn the ignition switch OFF and remove the first key.
3. Insert the second valid key and turn the ignition switch ON within 15 seconds. After ten seconds, a chime will sound and the SKIM indicator light will begin to flash. Turn the ignition switch OFF and remove the second key.

4. Insert a blank Sentry Key into the ignition switch and turn the ignition switch ON within 60 seconds. After 10 seconds, a single chime will sound. The SKIM indicator light will stop flashing, turn on for 3 seconds; then turn off.
The new Sentry Key has been programmed. Repeat this process to program up to a total of 8 keys.
The Sentry Key Immobilizer System complies with FCC rules part 15 and with RSS-210 of Industry Canada. Operation is subject to the following two conditions:
1. This device may not cause harmful interference.
2. This device must accept any interference that may be received, including interference that may cause undesired operation.
THINGS TO KNOW BEFORE STARTING YOUR VEHICLE 19
SECURITY ALARM SYSTEM — IF EQUIPPED
This system monitors the vehicle doors, swing gate, swing gate flip-up window, and ignition for unauthorized operation. When the alarm is activated, the system 2 provides both audible and visual signals. The horn, headlights, and tail lights will sound/flash repeatedly for three minutes. If disturbance is still present (driver’s door, passenger door, other doors, ignition) after three minutes, the headlights and tail lights will flash for an additional 15 minutes.
NOTE: The “Panic” and “Security” alarms are quite different. Please take a moment to activate the “Panic” and the “Security” modes to hear the differences in the horn. In case one should go off in the future, you will need to know which mode has been activated in order to deactivate it.

20 THINGS TO KNOW BEFORE STARTING YOUR VEHICLE
To Set the Alarm
The alarm will set when you use the remote keyless entry transmitter to lock the doors and swing gate or when you use the power door lock switch while the door is open. After all the doors are locked and closed, the “Sentry Key/Security Alarm Indicator Light” (located in the instrument cluster) will flash rapidly for about 16 seconds to signal that the system is arming. During this 16 second arming period, opening any door or the swing gate will cancel the arming. If the system successfully arms, the “Sentry Key/Security Alarm Indicator Light” will flash at a slower rate to indicate the alarm is set.
To Disarm the System
To disarm the system, you will need to press the “Unlock” button on the remote keyless entry transmitter or turn the ignition key to the RUN position. If something has triggered the system in your absence, the horn will sound three times when you unlock the doors. Check the vehicle for tampering.
NOTE: On vehicles equipped with Remote Keyless Entry (RKE), there will not be a door lock cylinder on the front passenger door, rear doors, or rear swing gate. Therefore, you will be unable to disarm the system with a manual unlock of the passenger or rear doors.
The Security Alarm System is designed to protect your vehicle; however, you can create conditions where the system will arm unexpectedly. If you remain in the vehicle and lock the doors with the transmitter, once the system is armed (after 16 seconds), when you pull the door handle to exit the alarm will sound. If this occurs, press the “Unlock” button on the remote keyless entry transmitter to disarm the system. You may also accidentally disarm the system by unlocking the driver’s door with the key and then locking it. The door will be locked but the Security Alarm will not arm.
![]()
The interior lights come on when you open any door. They will remain on for about 30 seconds after all doors are closed then fade to off, unless, the dome inhibit feature was selected on the multi-function control lever. Refer to “Lights” in Section 3 of this manual.
The lights also will fade to off if you turn on the ignition after you close all the doors.
REMOTE KEYLESS ENTRY
This system allows you to lock or unlock the doors, open the swing gate flip-up window, or activate the panic alarm from distances of 23–50 feet (7–15 meters) using a transmitter. You don’t have to point the transmitter at the vehicle to activate the system. Each vehicle comes with two transmitters.
THINGS TO KNOW BEFORE STARTING YOUR VEHICLE 21
Four Button Transmitter
To Unlock the Doors
Press and release the “Unlock” button once to unlock the driver’s door. Press the button again within 5 seconds to unlock all the doors. If your vehicle is equipped with Illuminated Entry, the interior lights also come on and

22 THINGS TO KNOW BEFORE STARTING YOUR VEHICLE
remain on for about 30 seconds, when you unlock the doors. The park lights will flash twice to acknowledge the unlock signal.
NOTE: The transmitter can be programmed to unlock all the doors upon the first press of the Unlock button (within 23–50 feet (7–15 meters) of the vehicle) by performing the following procedure:
1. Press and hold the Unlock button on the transmitter.
2. Continue to hold the Unlock button, wait at least 4 but no longer than 10 seconds, then press the “Lock” button.
3. Release both buttons.
4. Repeating steps 1–3 will restore original operation.
NOTE: The Light Flash can be enabled or disabled (within 23–50 feet (7–15 meters) of the vehicle) by performing the following procedure:
1. Press and hold the Lock button on the transmitter.
2. Continue to hold the Lock button, wait at least 4 but no longer than 10 seconds, then press the “Unlock” button.
3. Release both buttons.
4. Repeating steps 1–3 will restore original transmitter operation.
To Lock the Doors
Press and release the “Lock” button once to lock the doors, swing gate flip-up window, and swing gate.
The horn will chirp and the park lights will flash once to acknowledge the lock signal.
NOTE: The horn chirp can be enabled or disabled (within 23–50 feet (7–15 meters) of the vehicle) by the following procedure:
1. Press and hold the Lock button on the transmitter.

2. Continue to hold the Lock button, wait at least 4 but no longer than 10 seconds, then press the Panic button.
3. Release both buttons.
4. Repeating steps 1–3 will restore original transmitter operation.
To Unlatch the Swing Gate Flip-Up Window
Press the “Rear Release” button twice to unlatch the swing gate flip-up window.
To avoid injury stand back when opening. Glass will automatically rise.
NOTE: The transmitter can be programmed to unlatch the flip-up window immediately upon activation of the
THINGS TO KNOW BEFORE STARTING YOUR VEHICLE 23
“Rear Release” button (without pressing and holding) (within 23–50 feet (7–15 meters) of the vehicle) by performing the following procedure:
1. Press and hold the “Unlock” button on the transmitter. 2
2. Continue to hold the “Unlock” button, wait at least 4 but no longer than 10 seconds, then press the “Rear Release” button.
3. Release both buttons.
4. Repeating steps 1–3 will restore original transmitter operation.
NOTE: Unlatching the flip-up window will unlock the swing gate. After closing the flip-up window, press the “Lock” button on the transmitter to lock the swing gate.

24 THINGS TO KNOW BEFORE STARTING YOUR VEHICLE
The panic mode flashes the park lights, and sounds the horn for about 3 minutes or until the alarm is turned off.
To Use the Panic Alarm
Press and hold the PANIC button for at least 1 second to activate the panic alarm. Press and hold the PANIC button a second time to deactivate the alarm. The alarm will also shut itself off after starting the vehicle and accelerating to 15 mph (24 km/h).
NOTE: The “Panic” and “Security” alarms are quite different. Please take a moment to activate the “Panic” and the “Security” modes to hear the differences in the horn. In case one should go off in the future, you will need to know which mode has been activated in order to deactivate it.
To Program Additional Transmitters
NOTE: If vehicle is equipped with the optional Electronic Vehicle Information Center (EVIC) in the overhead console, the transmitters may also be programmed through the EVIC display. For additional information, refer to “Overhead Console — If Equipped” in Section 3. (See page 136 for more information.)
Up to 4 transmitters can be programmed to your vehicle. To obtain additional transmitters, contact your authorized dealer. To program a transmitter (within 23–50 feet (7–15 meters) of the vehicle), perform the following procedure:
1. Gather every transmitter that is to be used with the vehicle including any transmitters that are currently programmed.

2. Enter Program Mode: Turn the ignition to the ON position, and using a currently programmed transmitter; press and hold the Unlock button on the transmitter. Continue to hold the “Unlock” button, wait at least 4 but no longer than 10 seconds, then press and hold the PANIC button for at least 1 second. Release both buttons simultaneously.
3. Program Each Transmitter: All transmitters to be used with your vehicle must be programmed as follows:
Press and release the Lock and Unlock buttons simultaneously, followed by a press and release of ANY button on each transmitter to be programmed. You will hear a chime when a transmitter has been successfully programmed.
THINGS TO KNOW BEFORE STARTING YOUR VEHICLE 25
This transmitter complies with FCC rules part 15 and
with RSS-210 of Industry Canada. Operation is subject to
the following two conditions:
1. This device may not cause harmful interference.
2. This device must accept any interference that may be received, including interference that may cause undesired operation.
If your Remote Keyless Entry fails to operate from a normal distance, check for these two conditions:
1. Weak batteries in transmitter. The expected life of batteries is from one to two years
2. Closeness to a radio transmitter such as a radio station tower, airport transmitter, and some mobile or CB radios.

26 THINGS TO KNOW BEFORE STARTING YOUR VEHICLE
Transmitter Battery Service
The recommended replacement battery is the Panasonic CR2032 or equivalent.
1. Pry the transmitter halves apart with a dime or similar object. Make sure not to damage the rubber gasket material during removal.
2. Remove and replace the batteries. Avoid touching the new batteries with your fingers. Skin oils may cause battery deterioration. If you touch the battery, clean it with rubbing alcohol.
3. Reassemble the transmitter case. Snap the halves together and test transmitter operation.
The vacuum fluorescent (VF) display located in the odometer area displays the word “door” as an indication of a door ajar or door not completely closed. When the vehicle is not moving and the door is ajar or not completely closed, the VF display will show the word “door” and then show the odometer/trip odometer mileage (each for 2 seconds). The display will continue to cycle.

NOTE: If vehicle is equipped with the optional Electronic Vehicle Information Center (EVIC) in the overhead console, all warnings including “door”, “GATE”, and “GLASS” will only be displayed in the EVIC display (not in the instrument cluster). For additional information, refer to “Overhead Console — If Equipped” in Section 3.
THINGS TO KNOW BEFORE STARTING YOUR VEHICLE 27
If any other active warnings including “GATE” or “GLASS” are present, they will be shown in the VF display and will also continue to cycle. If the vehicle is moving, three single chimes will occur (One chime for 2 each complete display cycle (three cycles total). After this, the display will continue to cycle only (no chimes).
If the trip/reset button is pressed while the VF warnings are being displayed, the VF display will revert back to only displaying the odometer/trip odometer mileage.
Door Open Display

28 THINGS TO KNOW BEFORE STARTING YOUR VEHICLE
Manual Door Locks
Use the manual door lock plunger to lock the doors from inside the vehicle. If the plunger is down when the door is closed, the door will lock. Therefore, make sure the keys are not inside the vehicle before closing the door.
• For personal security, and safety in the event of an accident, lock the vehicle doors as you drive as well as when you park and leave the vehicle.
• When leaving the vehicle always remove the key from the ignition lock, and lock your vehicle. Do not leave children unattended in the vehicle, or with access to an unlocked vehicle. Unsupervised use of vehicle equipment may cause severe personal injuries and death.
Door Lock Plunger

Power Door Locks — If Equipped
A door lock switch is on each front door panel. Press this switch to lock or unlock the doors.
Power Door Lock Switch
THINGS TO KNOW BEFORE STARTING YOUR VEHICLE 29
If the plunger is down when the door is closed, the door will lock. Therefore, make sure the keys are not inside the vehicle before closing the door.
If you press the door lock switch while the keys are in the 2 ignition switch, and the driver’s door is open, the doors will not lock.
The rear doors cannot be opened from inside the vehicle until you pull up the lock plungers.
Automatic Door Locks — If Equipped
The doors will lock automatically if:
1. all doors are closed,
2. vehicle speed is above 15 mph (24 km/h),
3. and the accelerator pedal is depressed.
This will occur only once, will not reoccur until a door is opened.

30 THINGS TO KNOW BEFORE STARTING YOUR VEHICLE
Child Protection Door Lock
The rear doors of your vehicle are equipped with child protection locks. If you push up on the lever on the open edge of the door it cannot be opened from the inside of the vehicle. Push the lever down to disengage the child protection locks.
Avoid trapping anyone in the vehicle in a collision. Remember that the rear doors can only be opened from the outside when the child protection locks are engaged.
Child Protection Door Lock
![]()
Power Front Windows
The power window switches are located on the center floor console. The top left switch controls the left front window and the top right switch controls the right front window. The lower left switch controls the left rear passenger window, and the lower right switch controls the right rear passenger window. The switches will continue to function for up to 10 minutes after the ignition key has been removed, or until a door is opened.
THINGS TO KNOW BEFORE STARTING YOUR VEHICLE 31
Power Window Switches
The window lock switch located next to the window switches allows you to disable the rear passenger window switches that are located on the back of the center floor console.

32 THINGS TO KNOW BEFORE STARTING YOUR VEHICLE
Auto Down Feature — If Equipped
The driver’s and passenger’s front window switches have an auto down feature. Press the window switch past the detent, release, and the window will go down automatically.
To open the window part way, press the window switch part way and release it when you want the window to stop.
Power Rear Windows
The rear passenger window switches are located on the back of the center floor console.
Rear Window Switches
Wind buffeting can be described as the perception of pressure on the ears or a helicopter type sound in the ears. Your vehicle may exhibit wind buffeting with the

windows down, or the sunroof (if equipped) in certain open or partially open positions. This is a normal occurrence and can be minimized. If the buffeting occurs with the sunroof open, adjust the sunroof opening to minimize the buffeting.
REAR SWING GATE
The swing gate can be unlocked using the remote keyless entry, or by activating the power door lock switches located on the front doors.
To avoid injury stand back when opening. Glass will automatically rise.
THINGS TO KNOW BEFORE STARTING YOUR VEHICLE 33
To open the swing gate, pull the gate handle to its first
detent to open just the flip-up window. Pull the handle to
its second detent (all the way) to open both the flip-up
window and swing gate.
Swing Gate Release Handle

34 THINGS TO KNOW BEFORE STARTING YOUR VEHICLE
To avoid injury stand back when opening. Glass will automatically rise.
The vacuum fluorescent (VF) display located in the odometer area displays the words “GATE” and/or “GLASS” as an indication of when the swing gate and/or flip-up window, is not completely closed. When the vehicle is not moving and the swing gate and/or flip-up window is not completely closed, the VF display will show the word “GATE” and/or “GLASS” and then show the odometer/trip odometer mileage (each for 2 seconds). The display will continue to cycle.
NOTE: If vehicle is equipped with the optional Electronic Vehicle Information Center (EVIC) in the overhead console, the warnings “door”, “GATE”, or “GLASS” will
be displayed in the EVIC display (not in the instrument cluster). For additional information, refer to “Overhead Console — If Equipped” in Section 3.
Gate Open Display

Glass Open Display
If any other active warnings including “door” are present, they will be shown in the VF display and will also continue to cycle. If the vehicle is moving, two single chimes will occur if the rear glass is open or three single chimes will occur if the rear swing gate is open (one
THINGS TO KNOW BEFORE STARTING YOUR VEHICLE 35
chime for each complete display cycle). After this, the VF display will continue to sequence only (no chimes).
If the trip/reset button is pressed while the VF warnings 2 are being displayed, the VF display will revert back to only displaying the odometer/trip odometer mileage.
NOTE: Close swing gate before flip-up window.
Do not press on rear wiper blade when closing swing gate, as damage to the blade will result.

36 THINGS TO KNOW BEFORE STARTING YOUR VEHICLE
Driving with the flip-up window open can allow poisonous exhaust gases into your vehicle. You and your passengers could be injured by these fumes. Keep the flip-up window closed when you are operating the vehicle.
NOTE: The rear swing gate will lock while the rear wiper is operating. The gate will stay locked until the wiper is turned off and the gate is unlocked (by key, lock switch, or key fob).
NOTE: The swing gate will lock automatically when the vehicle begins moving.
Some of the most important safety features in your vehicle are the restraint systems. These include the front and rear seat belts for the driver and all passengers, front airbags for both the driver and front passenger and, if equipped, window bags for the driver and passengers seated next to a window. If you will be carrying children too small for adult-size belts, your seat belts also can be used to hold infant and child restraint systems.
NOTE: The front airbags have a multi stage inflator design. This allows the airbag to have different rates of inflation that are based on collision severity.
Please pay close attention to the information in this section. It tells you how to use your restraint system properly to keep you and your passengers as safe as possible.

In a collision, you and your passengers can suffer much greater injuries if you are not properly buckled up. You can strike the interior of your vehicle or other passengers, or you can be thrown out of the vehicle. Always be sure you and others in your vehicle are buckled up properly.
Buckle up even though you are an excellent driver, even on short trips. Someone on the road may be a poor driver and cause a collision which includes you. This can happen far away from home or on your own street.
THINGS TO KNOW BEFORE STARTING YOUR VEHICLE 37
Research has shown that seat belts save lives, and they can reduce the seriousness of injuries in a collision. Some of the worst injuries happen when people are thrown
from the vehicle. Seat belts reduce the possibility of 2 ejection and the risk of injury caused by striking the inside of the vehicle. Everyone in a motor vehicle should be belted at all times.
All the seats in your vehicle are equipped with lap/ shoulder belts.

38 THINGS TO KNOW BEFORE STARTING YOUR VEHICLE
The belt webbing retractor is designed to lock during very sudden stops or collisions. This feature allows the shoulder part of the belt to move freely with you under normal conditions. But in a collision, the belt will lock and reduce the risk of you striking the inside of the vehicle or being thrown out.
• Wearing a seat belt incorrectly is dangerous. Seat belts are designed to go around the large bones of your body. These are the strongest parts of your body and can take the forces of a collision the best. Wearing your belt in the wrong place could make your injuries in a collision much worse. You might suffer internal injuries, or you could even slide out of part of the belt. Follow these instructions to wear your seat belt safely and to keep your passengers safe, too.
• Two people should never be belted into a single seat belt. People belted together can crash into one another in an accident, hurting one another badly. Never use a lap/shoulder belt or a lap belt for more than one person, no matter what their size.

Lap/Shoulder Belt Operating Instructions
1. Enter the vehicle and close the door. Sit back and adjust the seat.
2. The seat belt latch plate is above the back of your seat. Grasp the latch plate and pull out the belt. Slide the latch plate up the webbing as far as necessary to make the belt go around your lap.
THINGS TO KNOW BEFORE STARTING YOUR VEHICLE 39

40 THINGS TO KNOW BEFORE STARTING YOUR VEHICLE
3. When the belt is long enough to fit, insert the latch plate into the buckle until you hear a “click.”
Latch Plate To Buckle
A belt that is buckled into the wrong buckle will not protect you properly. The lap portion could ride too high on your body, possibly causing internal injuries. Always buckle your belt into the buckle nearest you.
A belt that is too loose will not protect you as well. In a sudden stop you could move too far forward, increasing the possibility of injury. Wear your seat belt snugly.
A belt that is worn under your arm is very dangerous. Your body could strike the inside surfaces of the vehicle in a collision, increasing head and neck injury. A belt worn under the arm can cause internal injuries. Ribs aren’t as strong as shoulder bones. Wear the belt over your shoulder so that your strongest bones will take the force in a collision.
A shoulder belt placed behind will not protect you from injury during a collision. You are more likely to hit your head in a collision if you do not wear your shoulder belt. The lap and shoulder belt are meant to be used together.
![]()
4. Position the lap belt across your thighs, below your abdomen. To remove slack in the lap portion, pull up a bit on the shoulder belt. To loosen the lap belt if it is too tight, tilt the latch plate and pull on the lap belt. A snug belt reduces the risk of sliding under the belt in a collision.
NOTE: The “Seat Belt Indicator Light” will remain on until the driver’s seat belt is buckled.
THINGS TO KNOW BEFORE STARTING YOUR VEHICLE 41
Removing Slack From Belt

42 THINGS TO KNOW BEFORE STARTING YOUR VEHICLE
A lap belt worn too high can increase the risk of injury in a collision. The belt forces won’t be at the strong hip and pelvic bones, but across your abdomen. Always wear the lap part of your seat belt as low as possible and keep it snug.
A twisted belt cannot do its job as well. In a collision it could even cut into you. Be sure the belt is straight. If you cannot straighten a belt in your vehicle, take it to your authorized dealer and have it fixed.
5. Position the shoulder belt on your chest so that it is comfortable and not resting on your neck. The retractor will withdraw any slack in the belt.
6. To release the belt, push the red button marked PRESS on the buckle. The belt will automatically retract to its stowed position. If necessary, slide the latch plate down the webbing to allow it to retract fully.
A frayed or torn belt could rip apart in a collision and leave you with no protection. Inspect the belt system periodically, checking for cuts, frays, or loose parts. Damaged parts must be replaced immediately. Do not disassemble or modify the system. Seat belt assemblies must be replaced after an accident if they have been damaged (bent retractor, torn webbing, pretensioner, etc.).

Rear Center Lap/Shoulder Belt Retractor Lock-Out
This feature is designed to lock the retractor whenever the 65% rear seat back is not fully latched. This prevents someone from wearing the rear center lap/shoulder belt when the rear seat back is not fully latched.
• If the rear center lap/shoulder belt cannot be pulled out, check that the rear seat back is fully latched.
• If the rear seat back is properly latched and the rear center lap/shoulder belt still cannot be pulled out, the Automatic-Locking Retractor (ALR) system may be activated. To reset this feature you must let all of the belt webbing return into the retractor. You will not be able to pull out more webbing until all of the webbing has been returned back into the retractor.
THINGS TO KNOW BEFORE STARTING YOUR VEHICLE 43
The rear center lap/shoulder belt is equipped with a lock-out feature to ensure that the rear seat back is in 2 the fully upright and locked position when occupied. If the rear seat back is not fully upright and locked and the rear center lap/shoulder belt can be pulled out of the retractor, the vehicle should immediately be taken to your dealer for service. Failure to follow this warning could result in serious or fatal injury.
Adjustable Upper Shoulder Belt Anchorage
In the front seat positions, the shoulder belt can be adjusted upward or downward to position the belt away from your neck. To lower the shoulder belt height, push the button and slide the height adjuster down. To raise

44 THINGS TO KNOW BEFORE STARTING YOUR VEHICLE
the height of the shoulder belt, slide the height adjuster up. Pull down on the height adjuster to make sure it is locked in place.
Adjusting Upper Shoulder Belt
Position the shoulder belt height adjusters so that the belt rests across the middle of your shoulder. Failure to adjust the safety belt properly could reduce the effectiveness of the seat belt and increase the risk of injury in a collision.
As a guide, if you are shorter than average, you will prefer a lower position, and if you are taller than average, you’ll prefer a higher position. When you release the anchorage, try to move it up or down to make sure that it is locked in position.
Automatic Locking Mode — If Equipped
In this mode, the shoulder belt is automatically prelocked. The belt will still retract to remove any slack in the shoulder belt.

When To Use The Automatic Locking Mode
Anytime a child safety seat is installed in a passenger front or outboard rear seating position (if equipped). Children 12 years old and under should be properly restrained in the rear seat whenever possible.
How To Use The Automatic Locking Mode
1. Buckle the combination lap and shoulder belt.
2. Grasp the shoulder portion and pull downward until the entire belt is extracted.
3. Allow the belt to retract. As the belt retracts, you will hear a clicking sound. This indicates the safety belt is now in the automatic locking mode.
How to Disengage The Automatic Locking Mode
Disconnect the combination lap/shoulder belt and allow it to retract completely to disengage the automatic locking mode and activate the vehicle sensitive (emergency) locking mode.
THINGS TO KNOW BEFORE STARTING YOUR VEHICLE 45
Energy Management Feature
This vehicle has a safety belt system with an energy management feature at the driver and front passenger seating positions to help further reduce the risk of injury 2 in the event of a head-on collision.
This safety belt system has a retractor assembly that is designed to pay out webbing in a controlled manner. This feature is designed to help reduce the belt force acting on the occupant’s chest.

46 THINGS TO KNOW BEFORE STARTING YOUR VEHICLE
Seat Belt Pretensioners
The driver and front passenger seat belts are equipped
• After a vehicle collision, the driver and front with a pretensioning device that is designed to remove passenger outboard seat belt system must be any slack from the seat belt systems in the event of a checked by a qualified technician to verify that collision. This device improves the performance of the the “automatic locking retractor” feature for child seat belt by assuring that the belt is tight around the
seats is still functioning properly. In addition, all
occupant early in a collision. Pretensioners work for all
seat belts should be checked for proper function.
size occupants, including those in child restraints.
• The belt and retractor assembly must be replaced
NOTE: These devices are not a substitute for proper seat
if the seat belt assembly “automatic locking re-
belt placement by the occupant. The seat belt must still be
tractor” feature or any other seat belt function is
worn snugly and positioned properly.
not working properly when checked according to
The pretensioners are triggered by the front Airbag
the procedures in the Service Manual.
Control Module. Like the front airbags, the pretensioners
• Failure to replace the belt and retractor assembly
are a single use item. After a collision that is severe
could increase the risk of injury in collisions.
enough to deploy the airbags and pretensioners, they
must be replaced.

Enhanced Seat Belt Use Reminder System (BeltAlert)
If the driver’s or front passenger seat belt has not been buckled within 60 seconds of starting the vehicle and if the vehicle speed is greater than 5 mph (8 km/h), the Enhanced Warning System (BeltAlert) will alert the driver or front passenger to buckle their seat belt. The driver should also instruct all other occupants to buckle their seat belts. Once the warning is triggered, the Enhanced Warning System (BeltAlert) will continue to chime and flash the Seat Belt Warning Light for 96 seconds or until the driver’s or front passenger seat belt is buckled.
The Enhanced Warning System (BeltAlert) will be reactivated if the driver’s or front passenger seat belt is unbuckled for more than 10 seconds and the vehicle speed is greater than 5 mph (8 km/h).
THINGS TO KNOW BEFORE STARTING YOUR VEHICLE 47
The Enhanced Warning System (BeltAlert) can be enabled or disabled by your authorized dealer or by following these steps:
NOTE: The following steps must occur within the first 2 60 seconds of the ignition switch being turned to the ON or START position. The manufacturer does not recommend deactivating the Enhanced Warning System (BeltAlert).
1. Turn the ignition switch to the OFF position, and buckle the driver’s or front passenger seat belt.
2. Turn the ignition key to the ACCESSORY/RUN position (engine does not need to be running), and wait for the Seat Belt Warning Light to turn off.
3. Within 60 seconds of starting the vehicle, unbuckle and then re-buckle the driver’s or front passenger seat belt at least three times within 10 seconds, ending with the seat belt buckled.

48 THINGS TO KNOW BEFORE STARTING YOUR VEHICLE
4. Turn the ignition key to the OFF position. A single chime will sound to signify that you have successfully completed the programming.
The Enhanced Warning System (BeltAlert) can be reactivated by repeating this procedure.
NOTE: Although the Enhanced Warning System (BeltAlert) has been deactivated, the Seat Belt Warning Light will continue to illuminate while the driver’s or front passenger seat belt remains unfastened.
Seat Belts and Pregnant Women
We recommend that pregnant women use the seat belts throughout their pregnancy. Keeping the mother safe is the best way to keep the baby safe.
Pregnant women should wear the lap part of the belt across the thighs and as snug across the hips as possible.
Keep the belt low so that it does not come across the abdomen. That way the strong bones of the hips will take the force if there is a collision.
Seat Belt Extender
If a seat belt is too short, even when fully extended and when the adjustable upper shoulder belt anchorage (if equipped) is in its lowest position, your authorized dealer can provide you with a seat belt extender. This extender should be used only if the existing belt is not long enough. When it is not required, remove the extender and store it.

Using a seat belt extender when not needed can increase the risk of injury in a collision. Only use when the lap belt is not long enough when it is worn low and snug, and in the recommended seating positions. Remove and store the extender when not needed.
THINGS TO KNOW BEFORE STARTING YOUR VEHICLE 49
Driver And Front Passenger Supplemental
Restraint Systems (SRS) — Airbags
Front Airbag Components
This vehicle has airbags for both the driver and right front passenger as a supplement to the seat belt restraint systems. The driver’s front airbag is mounted in the steering wheel. The passenger side airbag is mounted in

50 THINGS TO KNOW BEFORE STARTING YOUR VEHICLE
the instrument panel, above the glove compartment. The words SRS/AIRBAG are embossed on the airbag covers.
NOTE: The front airbags are certified to the Federal regulations that allow less forceful deployment.
The front airbags have a multi stage inflator design. This may allow the airbag to have different rates of inflation that are based on collision severity and occupant size. Also, the front passenger airbag is certified to the Federal regulations that define Occupant Classification (Refer to “Occupant Classification System” in this section).
This vehicle may also be equipped with window bags to protect the driver, front, and rear passengers sitting next to a window. If the vehicle is equipped with window bags, they are located above the side windows. Their covers are also labeled SRS AIRBAG.
Window Airbag Location
NOTE: Airbag covers may not be obvious in the interior trim; but they will open to allow airbag deployment.
Источник