- Руководства по эксплуатации, обслуживанию и ремонту Kia Sorento
- Ремонт, эксплуатация, техобслуживание Kia Sorento с 2002 г.
- Руководство по ремонту и ТО Kia Sorento I 2002-2011 г.
- Руководство по ремонту и ТО Kia Sorento II с 2009 г.
- Руководство по ремонту и эксплуатации Kia Sorento Prime с 2015 г.
- Руководство по ремонту и эксплуатации Kia Sorento Prime с 2018 г.
- Руководство по ремонту и эксплуатации Kia Sorento с 2003 г.
- Руководство по ремонту и эксплуатации Kia Sorento с 2009 г.
- Руководство по эксплуатации Kia Sorento 2010 г.
- Руководство по эксплуатации Kia Sorento I.
- Руководство по эксплуатации Kia Sorento с 2002 по 2009 гг.
- Руководство по ремонту и эксплуатации Kia Sorento — распишем все нюансы
- AUTO-TEXCENTER.RU
- Обычно пользователи нашего сайта находят эту страницу по следующим запросам: мануал Kia Sorento, manual Kia Sorento, характеристики Kia Sorento, устройство Kia Sorento, ремонт Kia Sorento, сравнительные характеристики Kia Sorento
- О Книге
- Введение
- Kia Sorento: руководство по эксплуатации
- Инструкция по эксплуатации Киа Соренто
- Руководство по эксплуатации Киа Соренто: история модели
- Первое поколение Киа Соренто (2002-2010)
- Kia SORENTO 2006, Sorento 2006 Owner Manual
Руководства по эксплуатации, обслуживанию и ремонту Kia Sorento
Руководство на английском языке по кузовному ремонту автомобиля Kia Sorento первого поколения.
- Автор: —
- Издательство: Kia Motors
- Год издания: 2002
- Страниц: 78
- Формат: PDF
- Размер: 5,1 Mb
Ремонт, эксплуатация, техобслуживание Kia Sorento с 2002 г.
Руководство по эксплуатации, техническому обслуживанию и ремонту автомобиля Kia Sorento с 2002 года выпуска.
- Автор: —
- Издательство: М.А.Р.С.
- Год издания: —
- Страниц: 360
- Формат: —
- Размер: —
Руководство по ремонту и ТО Kia Sorento I 2002-2011 г.
Руководство по эксплуатации, техническому обслуживанию и ремонту + каталог расходных запчастей автомобиля Kia Sorento 2002-2011 годов выпуска с бензиновыми и дизельными двигателями.
- Автор: —
- Издательство: Легион-Автодата
- Год издания: —
- Страниц: 630
- Формат: —
- Размер: —
Руководство по ремонту и ТО Kia Sorento II с 2009 г.
Руководство по эксплуатации, техническому обслуживанию и ремонту + каталог расходных запчастей автомобиля Kia Sorento с 2009 года выпуска с бензиновыми и дизельными двигателями.
- Автор: —
- Издательство: Легион-Автодата
- Год издания: —
- Страниц: 678
- Формат: —
- Размер: —
Руководство по ремонту и эксплуатации Kia Sorento Prime с 2015 г.
Руководство по эксплуатации и ремонту автомобиля Kia Sorento Prime с 2015 года выпуска с бензиновыми и дизельными двигателями.
- Автор: —
- Издательство: Монолит
- Год издания: —
- Страниц: 450
- Формат: —
- Размер: —
Руководство по ремонту и эксплуатации Kia Sorento Prime с 2018 г.

Руководство по эксплуатации и ремонту автомобиля Kia Sorento Prime с 2018 года выпуска с бензиновыми и дизельными двигателями.
- Автор: —
- Издательство: Монолит
- Год издания: —
- Страниц: 628
- Формат: —
- Размер: —
Руководство по ремонту и эксплуатации Kia Sorento с 2003 г.
Руководство по эксплуатации и ремонту автомобиля Kia Sorento с 2003 года выпуска с бензиновыми и дизельными двигателями.
- Автор: —
- Издательство: Монолит
- Год издания: —
- Страниц: 268
- Формат: —
- Размер: —
Руководство по ремонту и эксплуатации Kia Sorento с 2009 г.
Руководство по эксплуатации и ремонту автомобиля Kia Sorento с 2009 года выпуска с бензиновыми и дизельными двигателями.
- Автор: —
- Издательство: Монолит
- Год издания: —
- Страниц: 448
- Формат: —
- Размер: —
Руководство по эксплуатации Kia Sorento 2010 г.
Руководство по эксплуатации и техническому обслуживанию автомобиля Kia Sorento 2010 года выпуска.
- Автор: —
- Издательство: Kia Motors
- Год издания: 2009
- Страниц: 503
- Формат: PDF
- Размер: 9,6 Mb
Руководство по эксплуатации Kia Sorento I.
Подборка руководств по эксплуатации и техническому обслуживанию автомобиля Kia Sorento первого поколения.
- Автор: —
- Издательство: Kia Motors
- Год издания: 2004/2005/2006
- Страниц: 348/345/392
- Формат: PDF
- Размер: 55,0 Mb
Источник
Руководство по эксплуатации Kia Sorento с 2002 по 2009 гг.


Скачать руководство с предоставленного файлообменника
Найдено 5 книг стоимостью от 583 руб.
Быстро купить книгу в оригинальной качественной версии PDF от издательства
Купить бумажную версию книги с доставкой по вашему адресу
Руководство по ремонту и обслуживанию автомобилей Kia Sorento первого поколения. Всего поколений два. Прочитав данное руководство, вы сможете поближе познакомиться со всеми мельчайшими деталями, которые возникают во время эксплуатации и ремонта автомобилей Kia Sorrento первого поколения, которые выпускались в период с 2002 по 2009 года. Двигатели в автомобилях первого поколения используются следующие, бензиновые: G4JS (2,4 л.) и G6CU (3,5 л.) и дизельные: D4CB (2,5 л. CRDi (VGT и WGT)).
В пособии рассказывается не только о ремонте автомобилей данной линейки, но и о том, как правильно проводить диагностику различных деталей и электронных схем автомобилей Kia Sorento I. Так же рассказывается о стандартных деталях, которые присутствуют в автомобиле Kia Sorento I, а так же даны советы, как понять, когда детали станут непригодны для процесса езды транспортного средства.
Книга станет хорошим дополнением при покупке самого автомобиля.
Источник
Руководство по ремонту и эксплуатации Kia Sorento — распишем все нюансы

Автосервис Москва, Авиамоторная
Автосервис ЮВАО, ВАО — метро Авиамоторная:
Автосервис Серп и Молот | Автосервис Красноказарменная | Автосервис Лефортово
Ближайшие станции метро — Авиамоторная, Площадь Ильича, Шоссе Энтузиастов, Чкаловская, Бауманская, Семеновская. Ближайшие для подъезда улицы — третье транспортное кольцо (ТТК), проезд завода Серп и Молот, Лефортовский вал, Красноказарменная улица.
Автосервис Москва, Октябрьское поле
Автосервис СЗАО, САО — метро Октябрьское поле, станция Зорге МЦК (район Щукино, Хорошёво—Мнёвники)
Ближайшие станции метро — Октябрьское поле, Полежаевская. Станция Московского Центрального Кольца — Зорге. Ближайшие для подъезда улицы — Маршала Бирюзова, Берзарина, Народного ополчения, Зорге, Куусинена, Расплетина.
Автосервис Москва, Щелковская
Автосервис ВАО — метро Щелковская (район Гольяново)
Ближайшие станции метро — Щелковская, Черкизовская, Бульвар Рокоссовского, Первомайская, Партизанская, Измайловская. Ближайшие для подъезда улицы — Щелковское шоссе, Амурская, Сиреневый бульвар, Монтажная улица, Байкальская улица, Открытое шоссе.
AUTO-TEXCENTER.RU
франшиза автосервиса
Ремонт (сервис) Киа, Хендай. Специализированный техцентр (автосервис) Kia, Hyundai в Москве. Copyright © 2001-2020. Все права сохранены. Обращаем Ваше внимание на то, что данный сайт носит исключительно информационный характер и ни при каких условиях не является публичной офертой, определяемой положениями Статьи 437 (2) Гражданского кодекса Российской Федерации.
Обычно пользователи нашего сайта находят эту страницу по следующим запросам:
мануал Kia Sorento, manual Kia Sorento, характеристики Kia Sorento, устройство Kia Sorento, ремонт Kia Sorento, сравнительные характеристики Kia Sorento
О Книге
- Название: KIA Sorento II Руководство по ремонту и техническому обслуживанию
- Бензиновые двигатели: G4KE 2.4 л (2359 см³) 174-175 л.с./128-129 кВт и дизельными D4HA/D4HB CRDi 2.2 л (2199 см³) 200-197 л.с./145-147 кВт
- Выпуск с 2009 года
- Серия: «Профессионал»
- Год издания: 2016
- Автор: Коллектив авторов
- Издательство: «Ассоциация независимых издателей»
- Формат: PDF
- Страниц в книге: 682
- Размер: 455.93 МБ
- Язык: Русский
- Количество электросхем: 131
Введение
Производство Kia Sorento начато в 2003 году с последующей модернизацией в 2006. В данном руководстве описывается автомобиль после модернизации – с двигателями 3.3 л и 3.8 л (бензиновые) и 2.5 л (дизельный).
Автомобиль Kia Sorento это среднеразмерный внедорожник с хорошими показателями по проходимости.
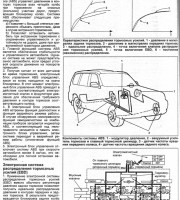
Sorento — автомобиль рамной конструкции с передней пружинной независимой подвеской и задней пружинной зависимой с четырьмя продольными и одной поперечной тягой (Панара).
Автомобиль комплектуется четырехступенчатой автоматической коробкой передач с гидротрансформатором. Возможны два типа привода колес: EST – автомобиль с принудительно подключаемым передним мостом и TOD – автомобиль с постоянным полным приводом. В зависимости от комплектации в заднем мосту возможна установка самоблокирующегося межколесного дифференциала.
В данном руководстве в полном объеме описаны два бензиновых двигателя V6 3.3 л и 3.8 л. Также изложено описание конструктивных особенностей дизельного двигателя R4 2.5 л.
На автомобиль в базовой комплектации установлены такие системы пассивной безопасности как ABS (антиблокировочная система тормозов) и ESP (система стабилизации курсовой устойчивости автомобиля). Kia Sorento оснащен подушками безопасности водителя, пассажира и боковыми подушками безопасности типа «занавески», что повышает защищенность людей при дорожно-транспортных происшествиях.
Автомобиль может быть оснащен кондиционером или климат-контролем, системой помощи при парковке, подогревом зеркал и сидений, а также кожаным салоном.
Источник
Kia Sorento: руководство по эксплуатации

Руководство по эксплуатации автомобиля Киа Соренто.
Инструкция по эксплуатации Киа Соренто
Руководство по эксплуатации Киа Соренто: история модели
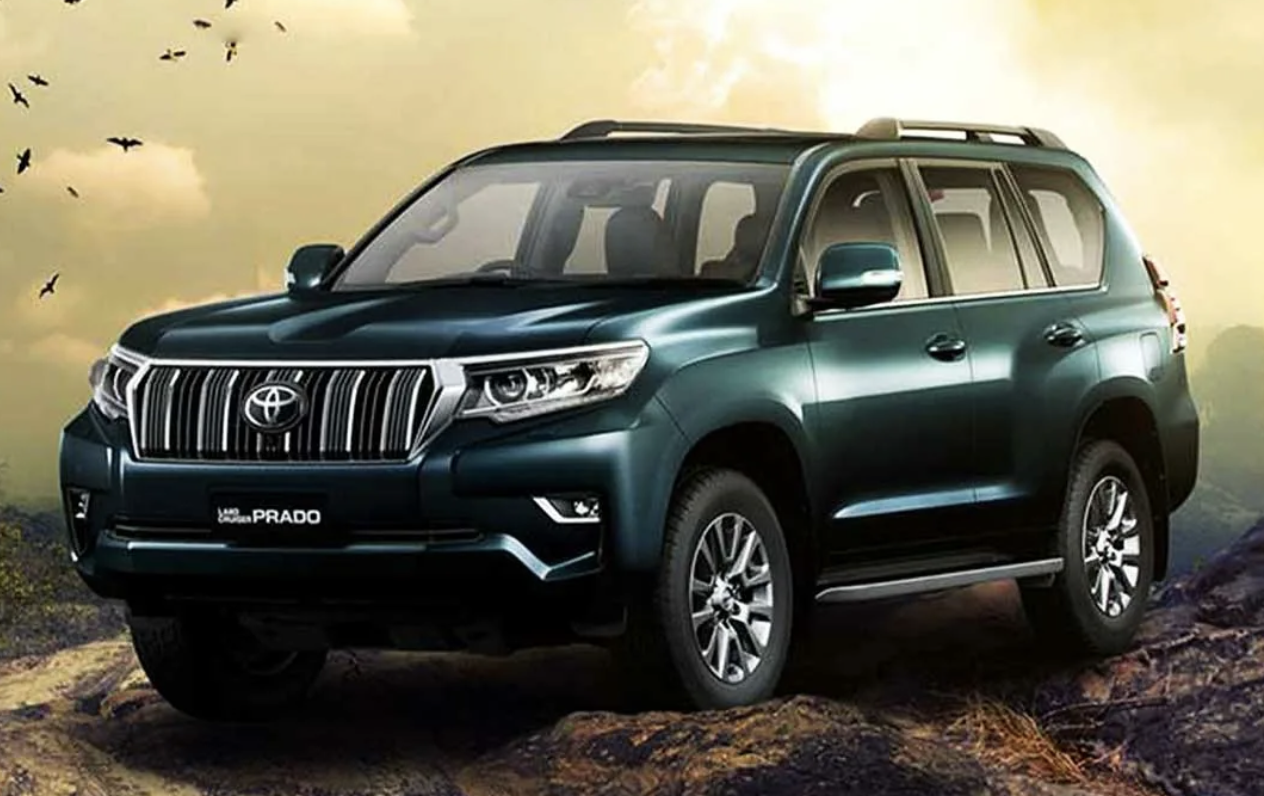
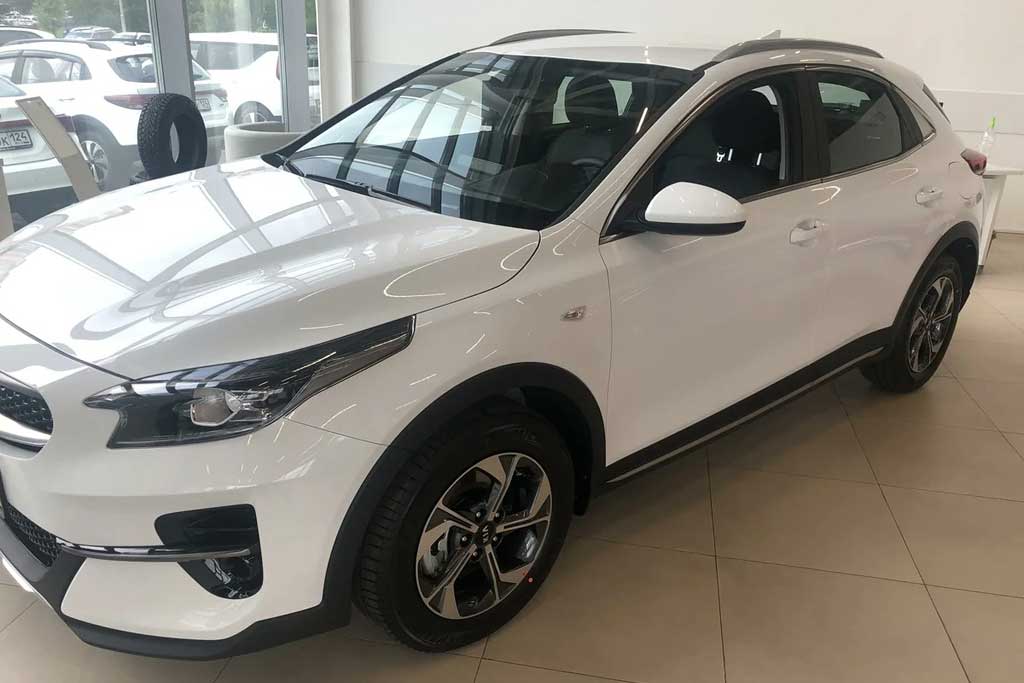
Первое поколение Киа Соренто (2002-2010)
Машина комплектовалась мотором DOHC V6 объемом в 3.5 л. Его мощность — 192 л.с. Была возможность выбора коробки переключения передач. Согласно инструкции по эксплуатации Киа Соренто, машина комплектовалась 5-ступенчатой «механикой» и 4 или 5-ступенчатой АКПП. В 2006 году был изменен дизайн модели.
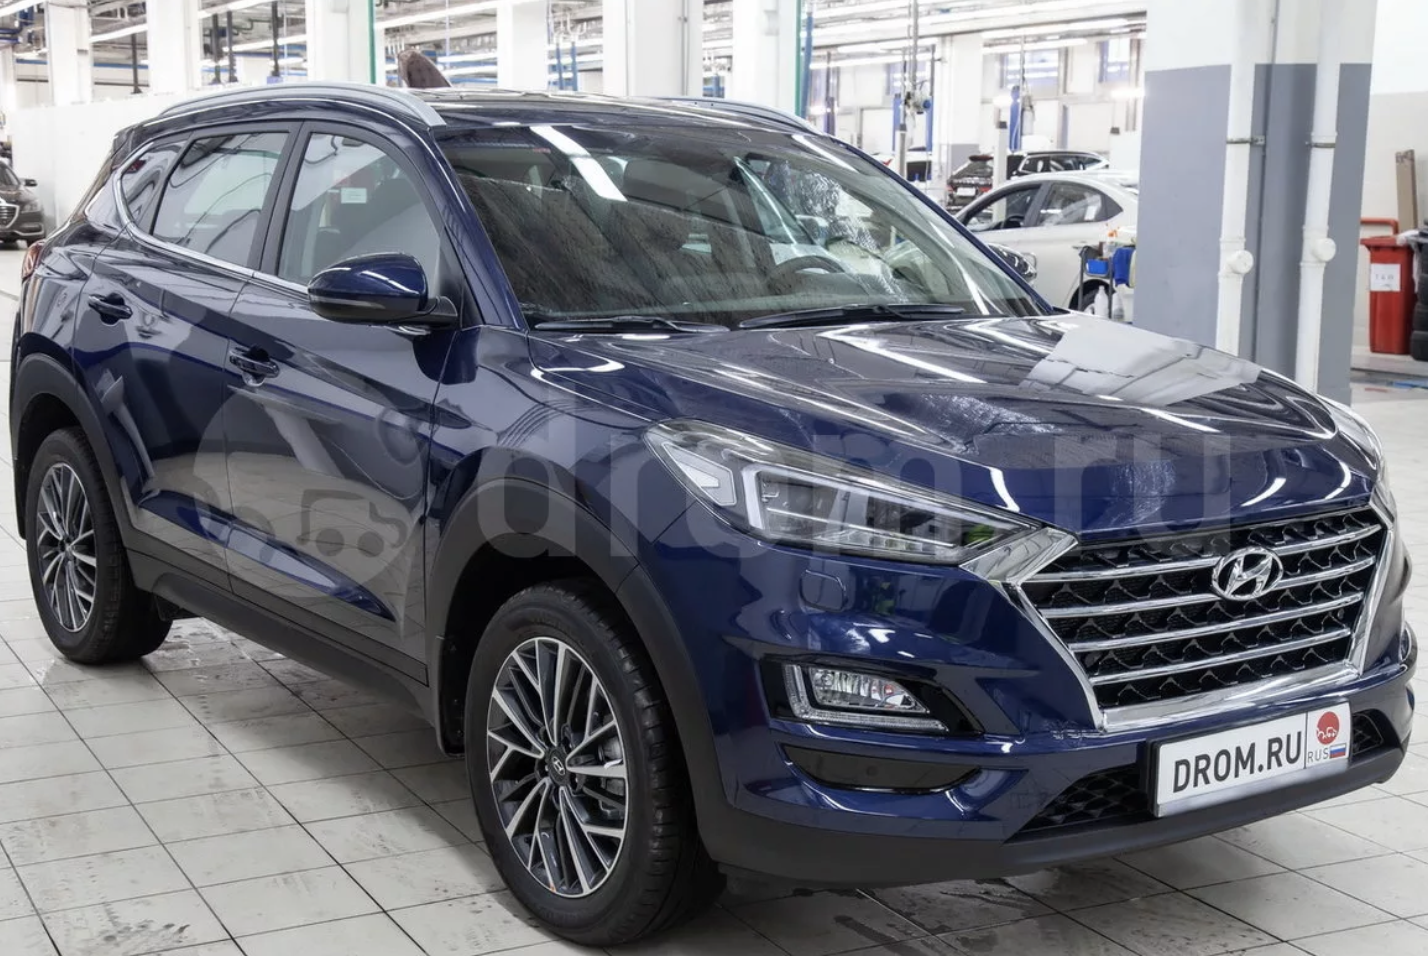
Второе поколение Киа Соренто (2009-2014)
Было представлено на Сеульском автосалоне в начале 2009 года. Эта машина презентовалась в трех комплектациях:
- LX — комплектовалась двигателем на 2.4 л с мощностью 175 л.с;
- EX — имеет мотор в 2.2 л на 191 л.с;
- SX — двигатель на 276 л.с. объемом в 3.5 л.
В 2013 году прошел масштабный рестайлинг поколения. Компания Kia начала предлагать машины с модернизированными двигателями. Появились два дизеля на 2.0 и 2.2 л. Был представлен и бензиновый мотор объемом в 2.4 л. Производитель заявил о том, что автомобиль стал обладать лучшей управляемостью. Большое внимание компания уделила безопасности. Предварительно можно прочитать руководство по эксплуатации Киа Соренто и узнать обо всех функциях.
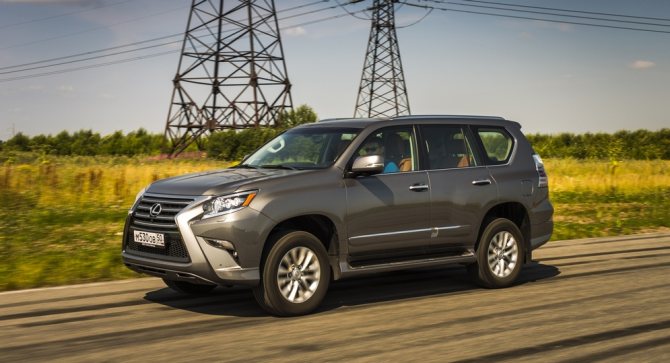
Третье поколение (с 2014 года)
Было представлено на Парижском автосалоне. В линейке присутствовали два бензиновых двигателя на 2.4 л и V6 объемом в 3.3 л. Кроме того, согласно мануалу Киа Соренто, авто выпускалость также с турбодизелем на 2.2 л (мощность — 200 л.с).
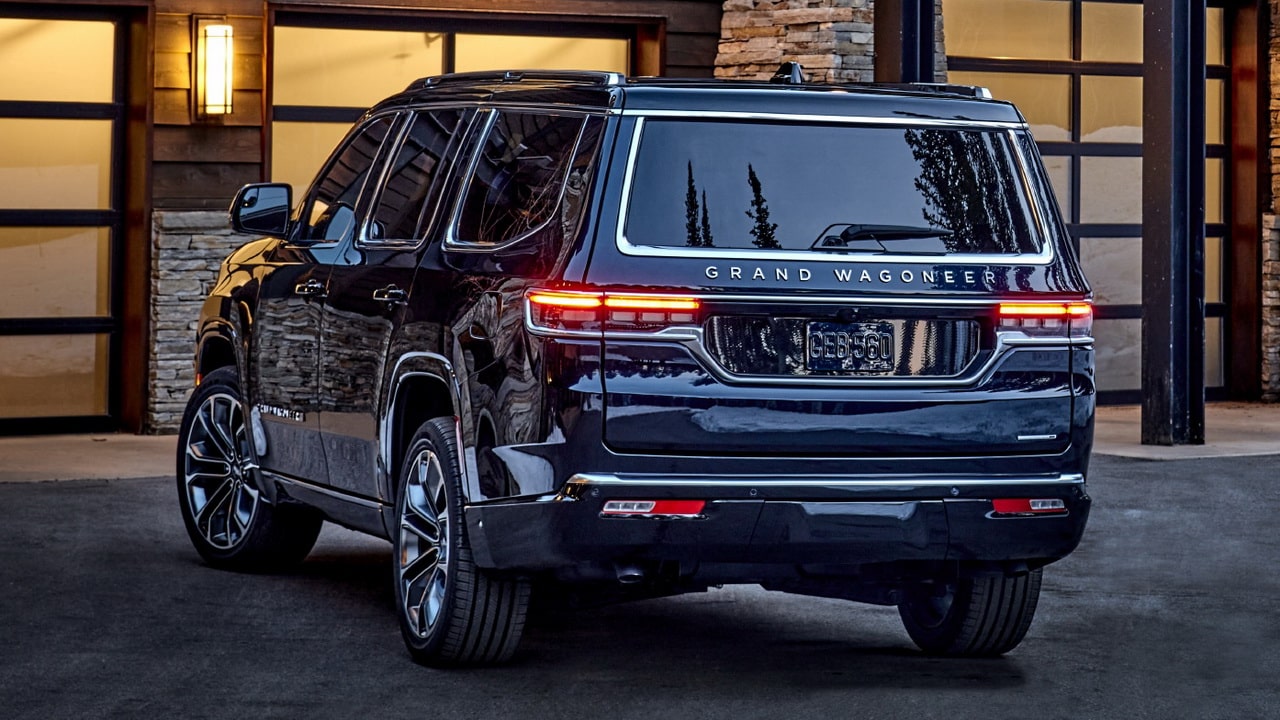
Компания представила его в начала 2020 года. Машина оснащена различными техническими новшествами. Разобраться в них поможет инструкция по эксплуатации Киа Соренто.
Источник
Kia SORENTO 2006, Sorento 2006 Owner Manual
![]()
KIA, THE COMPANY
Congratulations! Your selection of a Kia was a wise investment. It will give you years of driving pleasure. Now that you are the owner of a Kia vehicle, you’ll probably be asked a lot of questions about your vehicle and the company like “What is a Kia?”, “Who is Kia?”, “What does ‘Kia’ mean?”.
Here are some answers. First, Kia is the oldest car company in Korea. It is a company that has thousands of employees focused on building high-quality vehicles at affordable prices. The first syllable, Ki, in the word “Kia” means “to arise from to the world” or “to come up out of to the world.” The second syllable, a, means “Asia.” So, the word Kia, means “to arise from” or “to come up out of Asia to the world.”
Drive safely and enjoy your Kia!

Thank you for choosing a Kia vehicle.
When you require service, remember that your dealer knows your vehicle best. Your dealer has factory-trained technicians, recommended special tools, genuine Kia replacement parts and is dedicated to your complete satisfaction.
Because subsequent owners require this important information as well, this publication should remain with the vehicle if it is sold.
This manual will familiarize you with operational, maintenance and safety information about your new vehicle. It is supplemented by a Warranty & Consumer Information Manual that provides important information on all warranties regarding your vehicle. If your vehicle is equipped with an audio system, you will also receive a Kia Integrated Audio System Manual. We urge you to read these manuals carefully.
Kia offers a great variety of options, components and features for its various models.
Therefore, the equipment described in this manual, along with the various illustrations, may not all be applicable to your particular vehicle. The information and specifications provided in this manual were accurate at the time of printing. Kia reserves the right to discontinue or change specifications or design at any time without notice and without incurring any obligation. If you have questions, always check with your Kia Dealer.
We assure you of our continuing interest in your motoring pleasure and satisfaction in your Kia vehicle.
© 2005 Kia Motors Corp.
All rights reserved. Reproduction by any means, electronic or mechanical, including photocopying, recording, or by any information storage and retrieval system or translation in whole or part is not permitted without written authorization from Kia Motors Corporation.
Printed in Korea

TABLE OF CONTENTS
YOUR VEHICLE AT A GLANCE
KNOWING YOUR VEHICLE
DRIVING YOUR VEHICLE
IN CASE OF AN EMERGENCY


HOW TO USE THIS MANUAL
We want to help you get the greatest possible driving pleasure from your vehicle. Your Owner’s Manual can assist you in many ways. For your safety and the safety of your passengers, we strongly urge that you read the entire manual. In order to avoid death or injury, please review the WARNING and CAUTION sections contained throughout the manual. The WARNING and CAUTION sections are easily recognized by their special markings listed on this page.
Illustrations complement the words in this manual to best explain how to enjoy your vehicle. By reading your manual, you will learn about features, important safety information, and driving under various road conditions.
The general layout of the manual is provided in the Table of Contents. In addition, an alphabetical index located at the back of the manual has been provided for you reference.
Sections: This manual has eight sections plus an index. Each section begins with a brief list of contents to provide you with an overview of what is contained in that section.
You will find various WARNING’s, CAUTION’s, and NOTICE’s in this manual. These WARNING’s, CAUTION’s and NOTICE’s are provided to enhance your safety and continued satisfaction with your Kia vehicle.You should carefully read and follow all procedures and recommendations provided in these WARNING’s, CAUTION’s and NOTICE’s.
 WARNING
A WARNING indicates a situation in which serious bodily injury or death could result if the warning is ignored.
 CAUTION
A CAUTION indicates a situation in which personal injury, perhaps severe, could result if the caution is ignored.
A NOTICE indicates a situation in which damage to your vehicle could result if the notice is ignored.

VEHICLE HANDLING INSTRUCTIONS
As with other vehicles of this type, failure to operate this vehicle correctly may result in loss of control, an accident or vehicle rollover. Specific design characteristics (higher ground clearance, track, etc.) give this vehicle a higher center of gravity than ordinary cars. They are not designed for cornering at the same speeds as conventional 2-wheel drive vehicles. Avoid sharp turns or abrupt maneuvers. Again, failure to operate this vehicle correctly may result in loss of control, an accident or vehicle rollover. Be sure to read the “onpavement’’ and “off-road’’ driving guidelines, Section 5 in this manual.
VEHICLE BREAK-IN PROCESS
No special break-in period is needed. By following a few simple precautions for the first 600 miles (1 000 km) you may add to the performance, economy and life of your vehicle.
• Do not race the engine.
• Do not maintain a single speed for long periods of time, either fast or slow. Varying engine speed is needed to properly break in the engine.
• Avoid hard stops, except in emergencies, to allow the brakes to seat properly.
• Avoid full-throttle starts.

YOUR VEHICLE AT A GLANCE
Interior and Exterior Overview . . . . . . . . . . . . . . . . . . . . . . . . 2-2
Instrument Panel Overview. . . . . . . . . . . . . . . . . . . . . . . . . . . 2-3

YOUR VEHICLE AT A GLANCE
INTERIOR AND EXTERIOR OVERVIEW
1. Outside rearview mirror
2. Instrument cluster
3. Steering wheel
5. Rear hatch window
8. Power window switches
9. Rear door child safety lock
11. Parking brake lever

YOUR VEHICLE AT A GLANCE
INSTRUMENT PANEL OVERVIEW
M PASSENGER AIRBAG OFF
1. Light control / Turn signals
2. 4 wheel drive control knob (if equipped)
3. Instrument cluster
5. Climate control system (if equipped)
6. Radio (if equipped)
7. Passenger’s Air Bag (if equipped)
9. Hood release lever
10. Driver’s Air Bag (if equipped)
11. Steering wheel
12. Ignition switch
13. Parking brake lever
14. Shift lever (if equipped)
15. Power outlet

KNOWING YOUR VEHICLE
Air Bag — Supplemental Restraint System . . . . . . . . . . . . . .
![]()
KNOWING YOUR VEHICLE
The key code number is stamped on the plate attached to your key set. Should you lose your keys, this number will enable an authorized Kia dealer to duplicate your keys easily. Remove this plate from the key ring and store it in a safe place. Also, record the code number and keep it in a safe and handy place, but not in the vehicle.
 WARNING — Ignition Key
Leaving children unattended in a vehicle with the ignition key is dangerous even if the key is not in the ignition. Children could place the key in the ignition and operate the power windows or other controls, leading to a serious accident. Never leave a child alone in the vehicle, with or without keys.
 CAUTION
Use only Kia original parts for the ignition key in your vehicle. If an aftermarket key is used, the ignition switch may not return to ON after START. If this happens, the starter will continue to operate causing damage to the starter motor and possible fire due to excessive current in the wiring.

KNOWING YOUR VEHICLE
IMMOBILIZER SYSTEM — FOR GASOLINE ENGINE (IF EQUIPPED)
The immobilizer system is an antitheft device, designed to deter automobile theft.
 CAUTION
A transponder equipped in your ignition key is very important part to deactivate the immobilizer system. So you must not give any shock on it. It could cause the failure of your immobilizer system and your vehicle’s starting.
This key must be used first to register a unique ID code in the ICM.
This key is for general use. It will open all locks on your vehicle. One side of the key has the Kia logo and the other side has the “M” symbol.
 CAUTION
Don’t lose your ID key or forget the password.
Always keep your ID key in a place where you remember and record your password. If you don’t have both the password and ID key, consult your Authorized Kia Dealer.
When starting the engine, do not use the key with other immobilizer keys around. Otherwise the engine may not start or may stop soon after it starts. Keep each key separately not to have any malfunction after you receive your new vehicle.
If you need additional keys or lose your keys, your Authorized Kia Dealer can make new keys if you can supply the key number and ID key.
If you make your own duplicate key, you will not be able to cancel the system or start the engine.

KNOWING YOUR VEHICLE
Limp home (override) procedure
When you turn the ignition key to the ON position, if the IMMO indicator remains on continuously after blinking 6 times, the transponder installed in the ignition key is out of order. You cannot start the engine without using the limp home procedure. To start the engine, you have to input your password using the ignition switch.
The following procedure shows how to input a sample password of “2345.”
1. Turn the ignition key to the ON position. The IMMO indicator will blink 6 times and remain on indicating the beginning of the limp home procedure.
2. Turn the ignition key to the ACC position.
3. To enter the first digit (in this example “2”), turn the ignition key to the ON and ACC position twice. Wait 3 seconds but not more than 10 seconds, and perform the same procedure for the next digits (for example, for “3”, turn the ignition to ON and ACC 3 times).
4. If all of the digits have been input successfully, you have to start the engine within 10 seconds. If you attempt to start the engine after 10 seconds, the engine will not start and you will have to input your password again.
After performing the limp home procedure, you have to see an authorized Kia dealer immediately to inspect and repair your ignition key or immobilizer system.
 CAUTION
If you cannot start your engine in spite of the limp home procedure, have your vehicle towed by an authorized Kia dealer for inspection and necessary repairs.
 CAUTION
Do not change, alter or adjust the immobilizer system at your discretion. It could cause the malfunction of your immobilizer system. A malfunction resulting from the changing, altering and/or adjusting by persons other than an authorized Kia dealer will not be covered by the Kia Warranty.

KNOWING YOUR VEHICLE
Two turn unlock system
To unlock the other doors and rear hatch, turn the key to the rear of the vehicle twice within three seconds. To lock all doors and rear hatch, turn the key toward the front of the vehicle once.
Automatic Door Locks
Operating Door Locks — With the
• Turn the key toward rear of vehicle to unlock.
Turn the key toward front of vehicle to lock.
• All four doors and rear hatch can be locked and unlocked from the driver or passenger door with the key.
• Once the doors are unlocked, they may be opened by pulling the door handle.
Operating Door Locks — Without
Pushing the door lock knob and then closing the door enables the door to lock without a key.
Always remove the ignition key, engage the parking brake, close all windows and lock all doors when leaving your vehicle unattended.

KNOWING YOUR VEHICLE
Operating Door Locks — With Remote Keyless Entry (If equipped)
If your vehicle has this feature, you can lock and unlock your doors and rear hatch from up to 5 m (15 feet) away using the key chain transmitter supplied with your vehicle.
• Lock (  ):
):
If you depress the corresponding button on the transmitter, all four doors and rear hatch will lock and the hazard lamp will flash once.
• Unlock (  ):
):
If you depress the corresponding button on the transmitter, all the driver’s door will unlock, the hazard lamp will flash twice and the dome light and/or rear cargo area light will come on for 30 seconds if their switches are placed in the center position.
To unlock the other doors and rear hatch, depress the corresponding button twice within three seconds.
After depressing this button, unless you open the doors within 30 seconds, all four doors will lock automatically.
• Rear hatch window unlock (  ):
):
If you depress the corresponding button on the transmitter, the rear hatch window will unlock.
• Panic (  ):
):
If you depress the corresponding button on the transmitter for more than 2 seconds, the horn will sound and hazard lamp will flash for about 27 seconds.
 WARNING
Leaving your vehicle unlocked can invite theft or possible harm to you or others from someone hiding in your vehicle while you are gone. Always remove the ignition key, engage the parking brake, close all windows and lock all doors when leaving your vehicle unattended.
This device complies with Industry Canada Standard RSS-210.
Operation is subject to the following two conditions:
1. This device may not cause interference, and
2. This device must accept any interference, including interference that may cause undesired operation of the device.
 WARNING
Changes or modifications not expressly approved by the party responsible for compliance could void the user’s authority to operate the equipment.

KNOWING YOUR VEHICLE
1. Insert a slim tool into the slot and gently pry open the transmitter.
2. Remove and replace the 3-volt battery with the (+) facing up.
3. Reassemble the transmitter.
4. Check the transmitter operation.
• The keyless entry system may not operate when;
— the ignition key is in the ignition switch.
— you exceed the operating distance limit (5m).
— the battery in the transmitter is weak.
— other vehicles or objects may be blocking the signal. Check the location.
— the weather is very cold.
— the transmitter is close to a radio transmitter such as a radio station or an airport which can interfere with normal operation of the transmitter.
• If you have a problem with the keyless entry system, contact an authorized Kia dealer as soon as possible.
 CAUTION
• Using the wrong battery can cause the transmitter to malfunction. Be sure to use the correct battery.
• To avoid damaging the transmitter, don’t drop it, get it wet, or expose it to heat or sunlight.

KNOWING YOUR VEHICLE
Operating Door Locks From
Inside the vehicle
• To lock a door, push the door lock button to the “LOCK” position.
• To unlock a door, pull the door lock button to the “UNLOCK” position.
• To open a door, pull the door handle outward.
• If you pull the driver’s door handle, the driver’s door is automatically unlocked and opened.
Central Door Locks (If equipped)
• Pressing the front portion of the door lock switch will automatically lock all the doors and rear hatch.
• Pressing the rear portion of the door lock switch will automatically unlock all the doors and rear hatch.
• If you lock/unlock the driver door or the passenger door with a key, all the doors and rear hatch will automatically lock/unlock. (When unlocking the driver door with a key, refer to “Two turn unlock system” on page 3-5.)
• If you lock/unlock the passenger door with the manual door lock, all the doors and rear hatch will automatically lock/unlock.
• If you lock/unlock the driver door with the manual door lock, only the driver door will lock/unlock.
The door ajar warning light will illuminate when a door is not fully closed. Close the door completely and the light will go out.
If the airbag deploys, all doors will unlock automatically.

KNOWING YOUR VEHICLE
 WARNING — Unattended Children
An enclosed vehicle can become extremely hot, causing death or severe injury to unattended children or animals who cannot escape the vehicle. Furthermore, children might operate features of the vehicle that could injure them, or they could encounter other harm, possibly from someone gaining entry to the vehicle. Never leave children or animals unattended in your vehicle.
 CAUTION
The doors should always be fully closed and locked while the vehicle is in motion to prevent accidental opening of the door.
Locked doors will also discourage potential intruders when the vehicle stops or slows.
LOCKED
 FREE
FREE
Rear Door Child Safety Lock
The child safety lock prevents children from opening the rear doors from the inside. It should be used whenever children are in the vehicle. To lock, push the child safety lock to the “LOCKED” position.
• To lock a rear door so that it cannot be opened from the inside, push the child safety lock located on the rear edge of the door to the “LOCKED” position before closing the door.
• To open a rear door while the child safety lock is engaged, push the door lock button to the “UNLOCK” position (red mark is visible) then pull the outside door handle.
 WARNING
— Rear Door Locks
If children accidentally open the rear doors while the vehicle is in motion, the child could fall out and be seriously injured. To prevent a child from opening the rear doors from the inside, the rear door safety locks should be used whenever children are in the vehicle.

KNOWING YOUR VEHICLE
The ignition switch must be in the ON position for power windows to operate. Each door has a power window switch that controls that door’s window. However, the driver has a power window switch which can block the operation of the passenger windows.
To prevent the possibility of damage to the power window system, do not open or close more than two windows at the same time. This will also ensure the longevity of the fuse.
 WARNING — Windows
• Do not allow children to play with the power windows. They may seriously injure themselves or others.
• Always double check to make sure all arms, hands, and other obstructions are safely out of the way before closing a window.
Driver’s Door Power Window
The driver’s door has a master power window switch that controls all the windows in the vehicle. The ignition switch must be in the ON position for power windows to operate. To open a window, press down on the front portion of the corresponding switch. To close a window, pull up on the front portion of the corresponding power window switch.
Driver’s Window Automatic-down
The driver’s window has an “Automatic-Down” feature. To activate the express-down feature, momentarily depress the front of the switch to the second detent position. To cancel this feature, pull up on the front of the switch and then release it or momentarily depress the front of the switch to the first detent position.
Power Window Timer (If equipped)
The power windows can be operated for approximately 30 seconds after the ignition key is removed or turned to the ACC or LOCK position. However, if the front doors are opened, the power windows cannot be operated even within 30 seconds after the ignition key removal.

KNOWING YOUR VEHICLE
Driver’s Power Window Switch
The driver’s power window switch provides two (2) separate windowdown functions.
• Depressing the driver’s power window switch completely lowers the driver’s window automatically (Automatic-Down). To cancel this function, pull up on the front of the switch and release it or momentarily depress the front of the switch to the first detent position.
• Depressing the driver’s power window switch partially (to the first detent) provides precise control of the window-down position. To raise/close the driver’s window, pull up on the power window switch.
Power window lock switch
Power Window Lock Switch
The driver can disable the power window switches on a passenger door by depressing the power window lock switch located on the driver’s door to ON. When the power window lock switch is ON, the driver’s master control can not operate the passenger door power windows either.
 WARNING
• Keep the driver’s door power window lock switch in the ON (depressed) position, except when someone is operating a passenger door window. Serious injury can result (especially to children) from unintentional window operation.
• Always double check to make sure all arms, hands, and other obstructions are safely out of the way before closing a window.
If you notice buffeting and pulsation (wind shock) with either side window open, you should open the opposite window slightly to reduce the condition.
![]()
KNOWING YOUR VEHICLE
Passenger Doors Power Window
To open a window, press down on the front portion of the power window switch. To close a window, pull up on the front portion of the power window switch.
The driver’s door power window “LOCK” switch must be in the OFF position (not depressed) to operate the passenger door windows.

KNOWING YOUR VEHICLE
 WARNING — Driver’s Seat
• Adjusting the driver’s seat with the vehicle in motion could cause loss of control and a serious accident.
• Do not allow anything to interfere with the normal position of the seatback. Storing items against a seatback or in any other way interfering with proper locking of a seatback could result in serious or fatal injury in a sudden stop or collision.
• Always drive and ride with your seatback upright and the lap portion of the safety belt, or lap belt, snug and low across the hips. This position puts your safety belts in the best position to protect you in case of an accident.
• The Canadian Motor Vehicle Safety Standards (CMVSS) recommends that the driver sit at least 10 inches (250 mm) away from the steering wheel to avoid the risk of serious injury or death due to the deployment of the driver’s airbag.
Front Seat Adjustment — Manual
Moving the Front Seat Forward and Backward
To move the seat forward or backward, pull up on the lever under the front edge of the seat cushion, slide the seat to the desired position, and release the lever. To ensure the seat is locked in position, check for any seat movement.

KNOWING YOUR VEHICLE
 CAUTION
Loose objects in the driver’s foot area could interfere with the operation of the foot pedals, possibly causing an accident. Loose objects might interfere with the seat slide mechanism. Do not place anything under the front seats.
Adjusting the Front Seatback
To change the seatback angle, lean forward slightly and raise the lever located on the outer portion of the seat. Slowly and carefully lean back to the desired angle and release the lever. After adjustment, make sure that the lever has returned to its original locked position.
 WARNING — Front Seat
Riding in a vehicle with a front seatback reclined could lead to serious or fatal injury in an accident. If a front seat is reclined, the occupant’s hips may slide under the lap portion of the safety belt applying great force to the unprotected abdomen. Internal injuries could result. Keep the seatbacks in a comfortably upright position whenever the vehicle is in motion.

KNOWING YOUR VEHICLE
Adjusting the Height of Driver
To change the height (front portion) of the seat cushion, rotate the knob located on the outside of the seat cushion.
• To lower the seat cushion, rotate the knob toward the front of the vehicle.
• To raise the seat cushion, rotate the knob toward the rear of the vehicle.
To change the height (rear portion) of the seat cushion, rotate the knob located on the outside of the seat cushion.
• To lower the seat cushion, rotate the knob toward the front of the vehicle.
• To raise the seat cushion, rotate the knob toward the rear of the vehicle.
(Driver’s Seat Only)
You can adjust the lumbar support by moving the lever on the right side of the driver’s seatback. Pivoting the lever increases or decreases the lumbar support.

KNOWING YOUR VEHICLE
Driver Seat Adjustment — Power (If equipped)
The driver seat can be adjusted by using the control knob on the outside of the seat. Before driving, adjust the seat to the proper position so as to easily control the steering wheel, pedals and switches on the instrument panel.
 CAUTION
Do not operate two knobs at the same time.
 WARNING — Driver’s Seat
• Never attempt to adjust seat while the vehicle is moving. This could result in loss of control, and an accident causing death, serious injury, or property damage.
• In order to avoid unnecessary airbag injuries including the possibility of severe injury or death, always sit as far back as possible from the steering wheel while still being able to maintain comfortable control of your vehicle.
• The Canadian Motor Vehicle Safety Standards (CMVSS) recommends that the driver sit at least 10 inches (250 mm) away from the steering wheel to avoid the risk of serious injury or death due to the deployment of the driver’s airbag.
• The power seats are operable with the ignition OFF. Therefore, children should never be left unattended in the car.
Moving the Front Seat Forward
Push the control knob forward or backward to move the seat to the desired position. Release the knob and the seat will lock in that position.

KNOWING YOUR VEHICLE
Prior to operating the vehicle, ensure the seat is locked securely by trying to move the seat forward or backward without using the control knob. If the seat moves, it is not locked properly.
Adjusting the Front Seatback
Rotate the upper portion of the control knob forward or backward to recline the seatback to the desired position. Release the control knob and the seatback will lock in position.
Adjusting the Height of Front Seat
Front height of front seat cushion
Move the front portion of the control knob up to raise or down to lower the front part of the seat cushion.

KNOWING YOUR VEHICLE
Rear height of front seat cushion
Move the rear portion of the control knob up to raise or down to lower the rear part of the seat cushion.
Height of front seat cushion
To raise or lower the seat cushion totally, pull up and push down on the center of the corresponding switch.
 WARNING
To minimize the risk of possible severe personal injury in the event of a collision, both the driver’s and passenger’s seatbacks should be in a normal seating position while the car is in motion. The protection provided by the vehicle’s restraint system may be reduced significantly when the seatbacks are reclined. All parts of the restraint system are designed to absorb energy in an accident and this can best be accomplished if the seatback is in a normal seating position and the seatbelt is in close proximity to the occupant.

KNOWING YOUR VEHICLE
PASSENGER AIRBAG OFF
Heating the Front Seats (If equipped)
The front seats can be electrically heated individually when the ignition switch is ON. To heat one of the front seats, depress the corresponding switch on the center panel. To deactivate the seat heater, press the switch again.
The seat warmer will not operate if ambient temperature is above 37±3°C (98.5±5.5°F).
All the seat headrests provide comfort and also help protect your head and neck in the event of certain kinds of collisions.
Hold the headrest and pull up to raise it. It will lock into position. To lower the headrest, push the lock lever on the left side and push down on the headrest.

KNOWING YOUR VEHICLE
If your vehicle is equipped with the headrest swing feature, the front headrests may be adjusted forward to four positions by pulling it forward. To adjust the headrest backwards, pull it forward and release it.
 WARNING — Headrests
• To reduce the risk of head and neck injuries, don’t operate the vehicle with the headrest removed or improperly positioned.
• For best protection, adjust the headrest so its center is as high as your ears.
• Do not adjust the driver’s headrest while driving.

KNOWING YOUR VEHICLE
 WARNING
• The rear seatback must be securely latched. If not, passengers and objects could be thrown forward resulting in serious injury or death in the event of a sudden stop or collision.
• Luggage and other cargo should be laid flat in the cargo area. If objects are large, heavy, or must be piled, they must be secured. Under no circumstances should cargo be piled higher than the seatbacks. Failure to follow these warnings could result in serious injury or death in the event of a sudden stop, collision or rollover.
• No passenger should ride in the cargo area or sit or lie on folded seatbacks while the vehicle is moving. All passengers must be in seats and restrained properly while riding.
• When resetting the seatback to the upright position, make sure it is securely latched by pushing it forward and backwards.
• To avoid the possibility of burns, do not remove the carpet in the cargo area. Emission controls beneath this floor generate high exhaust temperatures.
Split Folding Rear Seat
The rear seatbacks fold forward to provide additional cargo space and to provide access to the cargo area.
• To fold the rear seatback(s) down, press the lock release button located on top of the seatbacks, then fold the seatback forward and down.
• To raise the seatback, lift and push it firmly until it clicks into place.
• When you return the seatback to its upright position, reposition the rear safety belts so that they can be used by rear seat passengers.
![]()
KNOWING YOUR VEHICLE
To fold the rear seat:
1. Pull up the strap to lift the rear portion of the seat cushion.
2. Remove the headrest and put the headrest poles into the holes on the rear of the seat cushion.
3. Press the lock release button on the seatbacks, then fold the seatback forward and down firmly.

KNOWING YOUR VEHICLE
To unfold the rear seat:
1. Lift and push the seatback back-
ward firmly until it clicks into place.
2. Replace the headrest on the seat-
3. Push the seat cushion down firmly.
 CAUTION
When you fold the rear seatback or put luggage on the rear seat cushion, you must insert the buckle into the pocket in the seatback. Doing so can prevent the buckle from being crushed by the rear seatback or luggage.
When returning the rear seatbacks to the upright position, remember to return the rear shoulder belts to their proper position. Routing the safety belt webbing through the rear safety belt guides will help keep the belts from being trapped behind or under the seats.

KNOWING YOUR VEHICLE
 CAUTION
Do not remove the floor carpet in your vehicle. Emission control system components cause high exhaust temperatures under the floor.
 WARNING — Cargo
Cargo should always be secured to prevent it from shifting and causing injury to the vehicle occupants.
This armrest is located in the center of the rear seatback. Pull the armrest down using the strap provided on the armrest.

KNOWING YOUR VEHICLE
Pre-tensioner Seat Belt
Your vehicle is equipped with driver’s and front passenger’s pre-tensioner safety belts. The purpose of the pretensioner is to pull the safety belt snugly against the occupant’s body in certain frontal collisions.
The pre-tensioner safety belts will activate, along with the airbags, when a frontal collision is severe enough.
Driver’s side airbag
When the vehicle stops suddenly, or if the occupant tries to lean forward too quickly, the seat belt retractor will lock into position. However, in certain frontal collisions, the pre-tensioner will also activate and pull the seat belt into tighter contact against the occupant’s body.
The safety belt pre-tensioner system consists mainly of the following components.
Their locations are shown in the illustration.
1. SRS airbag warning light.
2. Seat belt pre-tensioner assembly.
3. SRS control module.
 WARNING
To obtain maximum benefit from a pre-tensioner, safety belt must be worn correctly.

KNOWING YOUR VEHICLE
 CAUTION
• When the pre-tensioner safety belts are activated, a loud noise may be heard and fine powder, which may appear to be smoke, may be visible in the passenger compartment. The powder is not toxic.
• The powder may cause skin irritation and should not be breathed for prolonged periods.Wash your hands and face thoroughly after an accident in which such powder has been released.
• If the pre-tensioner seat belt is not working properly, the airbag warning light will illuminate, since both devices are on the same electrical circuit. If the SRS airbag warning light does not blink when the ignition key is turned to “ON” or “ACC”, or if it remains illuminated for more than 6 seconds, or if it illuminates while the vehicle is being driven, please have an authorized Kia dealer inspect the system as soon as possible.
 WARNING
— Pretentioner Repair or Replacement
• Pre-tensioners are designed to operate once. After activation, pre-tensioner safety belts must be replaced.
• Do not attempt to inspect, repair or replace the pre-ten- sioner safety belts yourself. You can permanently damage the system.
Safety Belt Restraint System
 WARNING — Safety Belts
To minimize the risk of serious or fatal injury in an accident, the driver and all passengers should use the appropriate safety restraints for their age and size. The presence of airbags does not change the need to be properly restrained by a safety belt or size-appro- priate child restraint. In fact, airbags can work properly when passengers are correctly restrained in the vehicle. Be sure you are familiar with the information in this section, including the information on infant and child restraints. Read the safety warnings on the sun visors.

KNOWING YOUR VEHICLE
We strongly recommend that the driver and all passengers be properly restrained at all times by using the safety belts provided with the vehicle. Proper use of the safety belts decreases the risk of severe injury or death in accidents or sudden stops. In most states, and in Canada, the law requires their use.
Inertial locks in the safety belt retractors allow all of the lap/shoulder safety belts to remain unlocked during normal vehicle operation.
This allows the occupants some freedom of movement and increased comfort while using the safety belts. If a force is applied to the vehicle, such as a strong stop, a sharp turn, or a collision, the safety belt retractors will automatically lock the safety belts.
Since the inertial locks do not require a collision to lock up, you may become aware of the safety belts locking while braking or going around sharp corners.
Whenever possible, use the center rear seat position to install your child restraint. The center rear seat is the safest position for a child to sit in. If the center seat is unavailable, a child restraint system may be installed in an outboard rear seat position. Never install a rear-facing infant seat in the front passenger position, as an inflating airbag could cause serious or fatal injury to a child in that position.
The rear safety belts use a special auto-lock feature designed to allow a child restraint to be used in these positions without an added locking clip. They normally lock only under extreme or emergency conditions (emergency lock mode). However they can be adjusted so that they remain in fixed and locked when a child restraint system is placed in these positions. (Use this auto-lock mode only to secure a child restraint, never for passengers restrained by the safety belts.) Page 3-38 gives instructions on placing the safety belt in the auto lock mode.
The drivers safety belt can only operate in the emergency lock mode.
Источник